Introduction
In this guide of the Center for Microscopy and Image Analysis we describe step by step how to optimize image acquisition settings on the Stellaris 5 with the help of the ZMB demo sample.
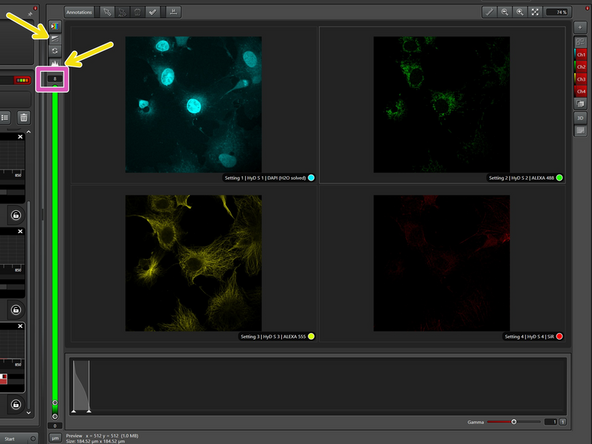
The demo sample contains four stainings:
-DAPI for nuclei
-Alexa 488 for mitochondria
-Alexa 555 for tubulin
-Silicon rhodamine (SiR) for actin
In task 1, you will learn how to set up and optimize imaging settings for the highest possible resolution of a z-stack of a single cell.
In task 2, you will learn ways how to be more flexible and potentially speed up image acquisition.
-
-
With the help of the eyepieces, find a nice cell and center it.
-
-
-
Search for the dyes and drag them to the Settings 1.
-
Open the dye assistant.
-
Choose one of the «line sequential» options without crosstalk.
-
You can still change to frame sequential afterwards, if needed. But like this, less spectral detector movement is needed and thus imaging is faster.
-
Put all the HyDs in counting operating mode.
-
See also steps 1, 3, 4, and 5 in the acquisition guide.
-
-
-
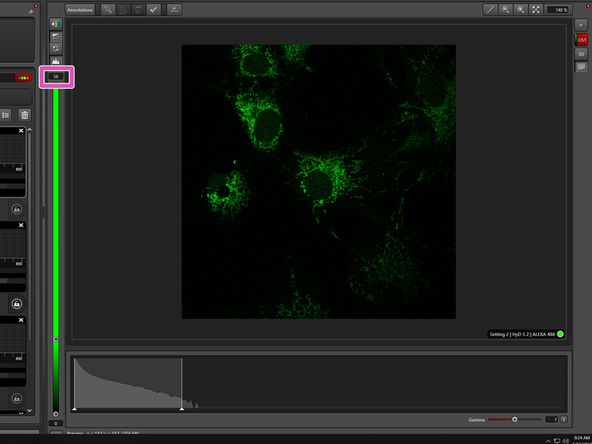
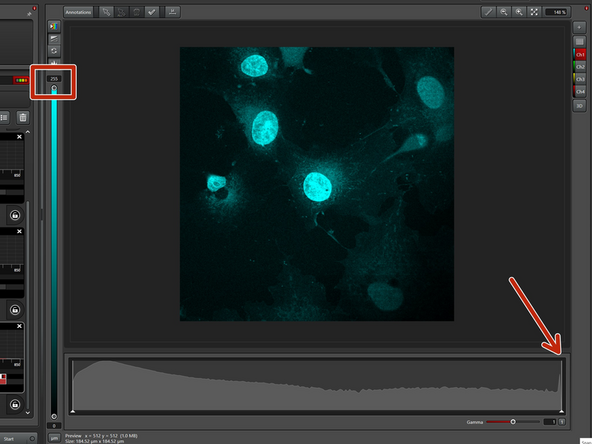
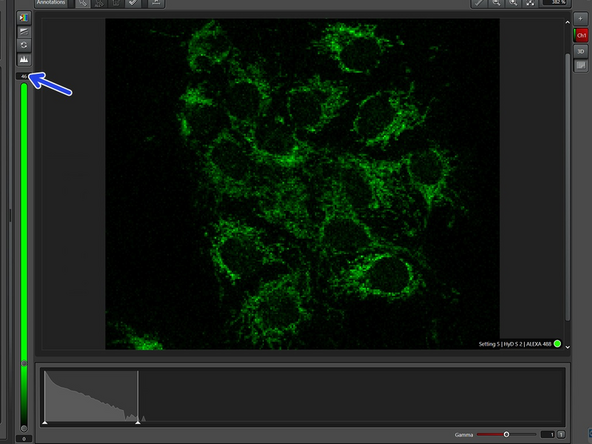
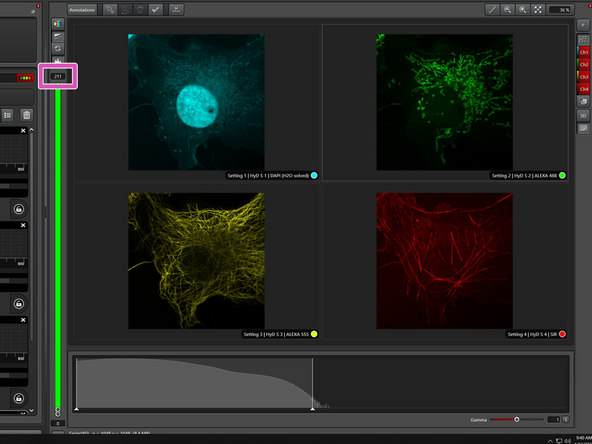
Go "Live".
-
Use autocontrast and activate the histogram.
-
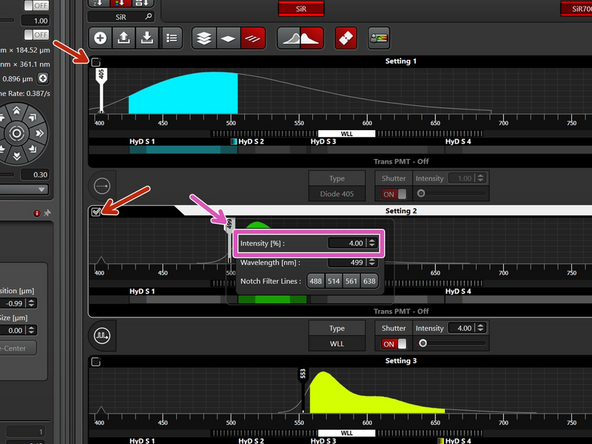
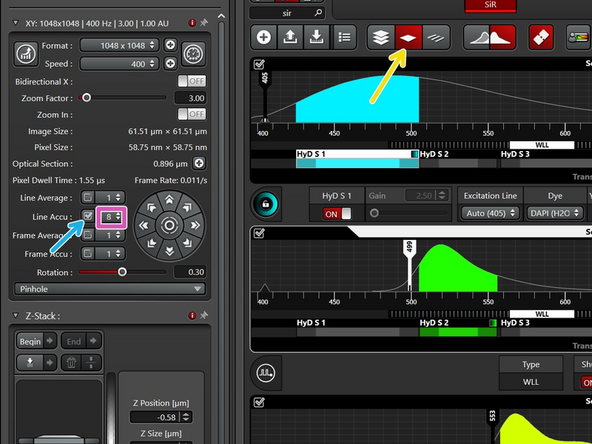
For easier optimization, deactivate the sequences that are not currently being optimized. Here, we optimize "Setting 2".
-
Start with 2% laser power and check the maximum number of photons. Double the laser power and check for doubling of the signal. This ensures that you are in the linear range, meaning the sample can emit 2x the number of photons and the detectors can detect all the additional photons. Aim for at least 100 counts as a maximum.
-
Repeat for all the channels.
-
-
-
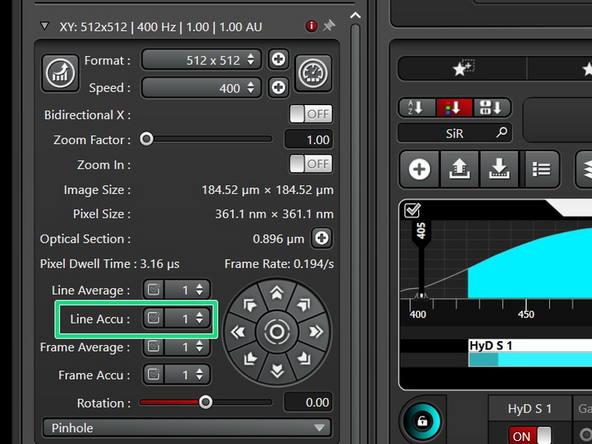
If in one or more channels you cannot increase the laser power enough to get to 100 counts while still staying in the linear range, increase the signal by "line accumulation".
-
In line sequential, the same number of repetitions is applied to all sequences.
-
This can lead to saturated images in other channels.
-
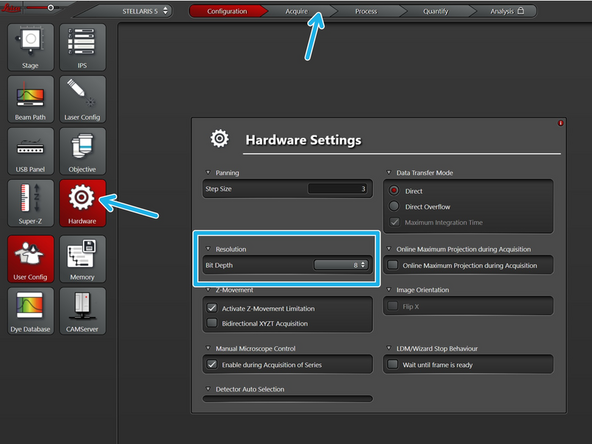
If so, please go to 12 or 16 bit.
-
The signal of your different structures might not all be at the same focus plane! (e.g. actin is strongest at the bottom).
-
Make sure you optimize the signal where there is a representative signal.
-
See also steps 7 and 10 in the acquisition guide.
-
-
-
Re-activate all sequences.
-
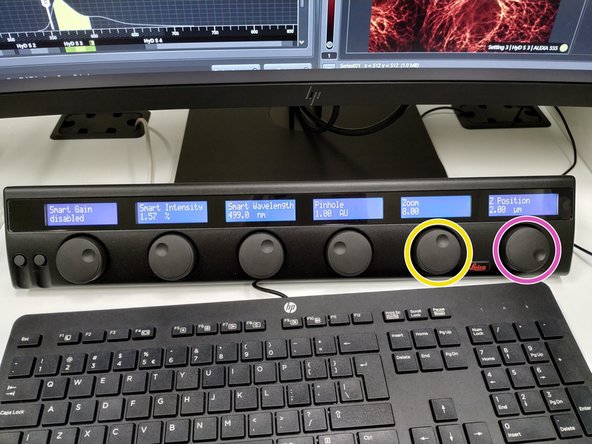
Zoom into your image (wheel!) so only one cell covers the whole field of view.
-
Make sure that the whole cell fits.
-
Use the corresponding wheel to scroll through the z-stacks.
-
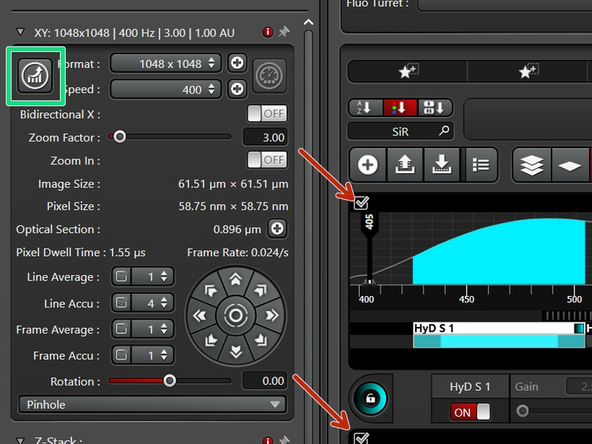
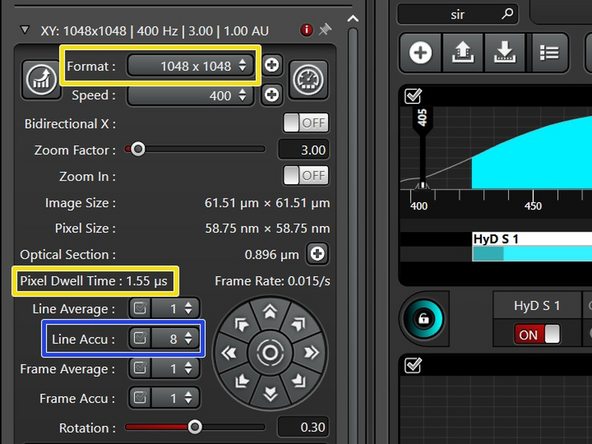
To get the correct pixel size for the best resolution, use the auto-button in the software.
-
See also steps 8 in the acquisition guide.
-
-
-
If you increase the pixel number, your pixel dwell time will get reduced and the signal lowered. Therefore, a second round of imaging optimization is needed.
-
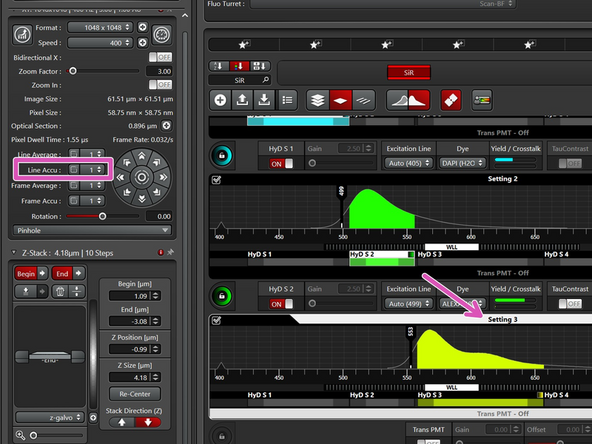
Optional: After setting the accumulation to 1, check again for the linear range of all sequences.
-
Instead of adjusting spead, adjust the number of repetitions of your dimmest signal to reach roughly 100 counts. Now you should have maxima of at least 100 counts in all sequences.
-
See also steps 9 and 10 in the acquisition guide.
-
-
-
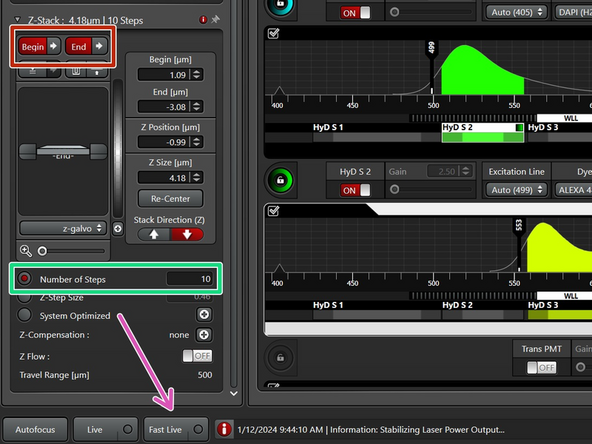
Set up both limits of the z-stack.
-
For quicker adjustment of the focus, use "Fast Live".
-
For Z-step size, choose "Number of steps"=10.
-
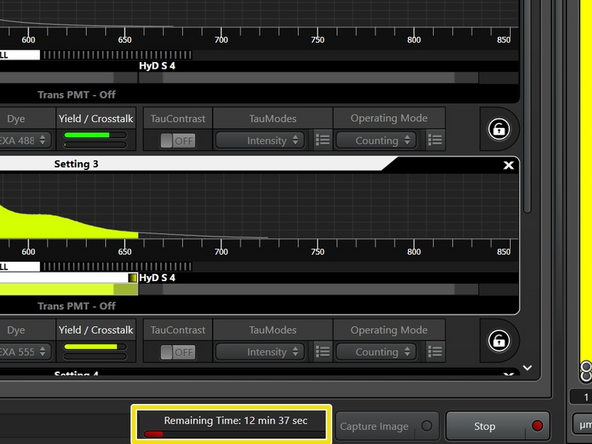
As soon as the first Z-plane is imaged, LAS-X gives a time estimation. Please not it down.
-
See also step 11 in the acquisition guide.
-
-
-
Switch to frame sequential.
-
Make sure that all the sequences have the same number of repetitions (i.e. the same as you had for line sequential).
-
Change to the number of repetitions you had for line sequential.
-
Click on the checkmark to apply this number to all the settings.
-
Acquire a Z-stack with otherwise the same settings. Also write down the estimated imaging time for this Z-stack.
-
-
-
The big advantage of the frame sequential is its flexibility.
-
Go through the sequences and check which is the minimal number of line accumulations in order to reach a maximum of 100 counts.
-
Acquire an Z-stack with otherwise the same settings. Note down the estimated imaging time.
-