-
-
Go to the "Open projects" tab.
-
Click on your data file and give it a meaningful name.
-
Click on the disk button to save the data. Alternatively right click on the specific "project" and choose "Save as..." from the drop down menu.
-
Choose your personal zmb data path folder on files.core.uzh.ch.
-
Please follow our instructions here on how to access your data.
-
-
-
You can save your settings and reuse them by loading them in your next imaging sessions. By default the following settings will be loaded: laser intensities, detector settings, averaging and accumulation settings.
-
Save your (sequential) scan settings if applicable.
-
In order to retrieve your saved scan settings in your next imaging session click "Load".
-
-
-
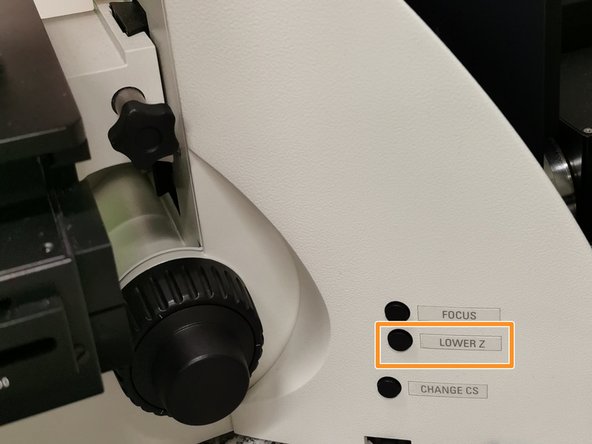
Lower the stage and remove your sample.
-
Clean the immersion objective(s) you have used with the available "KIMTECH" wipes and 100% EtOH.
-
Always clean the lenses in concentric circles and from the center to the edge. Clean also the sides of the objective(s).
-
Please also take care that immersion media has been cleaned off of all the other microscope parts which got in touch with.
-
-
-
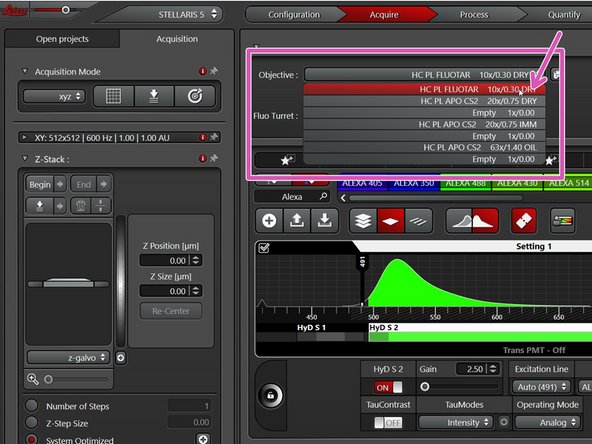
Switch to the 10x dry objective within the software.
-
-
-
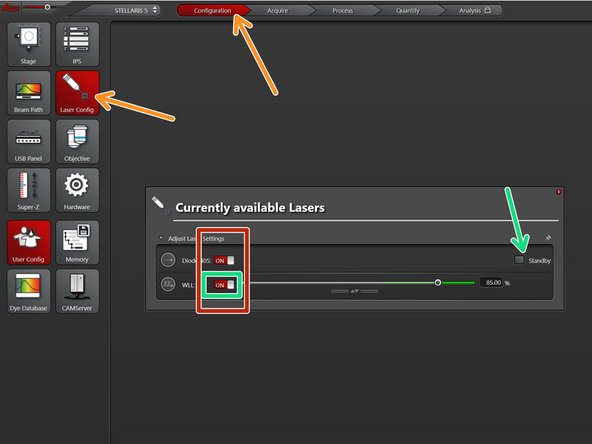
Go to "Configuration" and choose "Laser Config".
-
Check in the booking system if there is another booking within the next 2 hours.
-
If YES:
-
keep the lasers "ON" or put on "standby",
-
close the "LAS X" software and Sign out of your Windows profile.
-
If NO :
-
switch OFF all lasers ,
-
close the "LAS X" software, shut-down the PC and follow the next step.
-
-
-
Only follow this step if there is no booking within the next two hours.
-
Switch-OFF the fluorescence lamp.
-
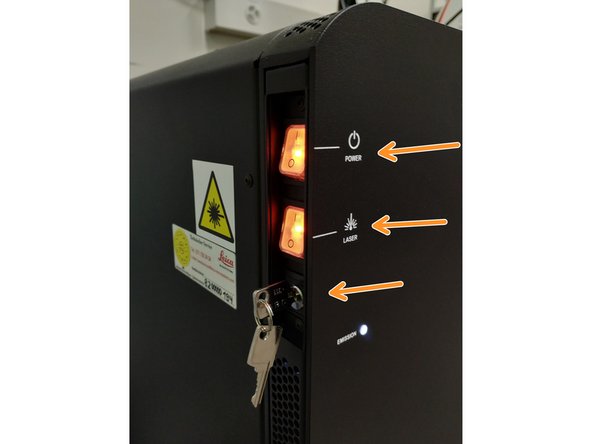
Turn off the Laser key (control unit next to the microscope) and switch OFF the "Laser" and "Power " switches.
-
Almost done!
Finish Line


