Introduction
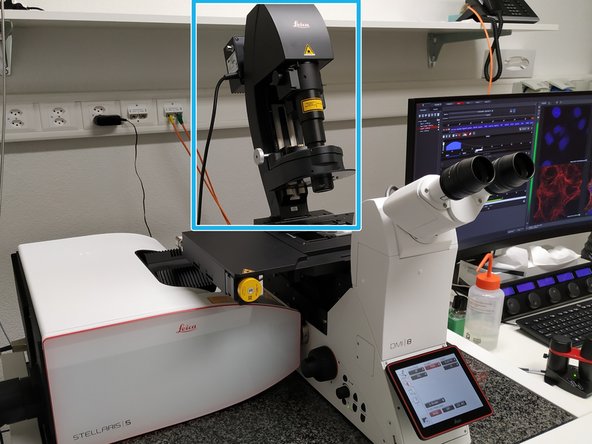
This guide from the Center for Microscopy and Image Analysis, delineates the steps for initializing and preparing a specimen for imaging on the Leica Stellaris 5 inverse confocal laser scanning microscope, now accessible at the University of Zurich's Botanical Garden facility located at Zollikerstrasse 107, 8008 Zürich.
This guide should familiarize you with the microscope, as well as its salient features:
- Spectrally Flexible White Light Laser (WLL): This newly integrated component exhibits an extended spectral range spanning from 485 nm to 685 nm, primarily concentrating on the red and near-infrared spectrum.
- Triple Power HyD S Detectors: The system is now equipped with three advanced Power HyD S detectors, enhancing sensitivity and precision in detection.
- TauSense Technology: The inclusion of TauSense technology affords users access to lifetime-based data, thereby enriching the depth and quality of insights obtainable from experimental analyses.
For more comprehensive information of the technical specifications and functionalities of this state-of-the-art system, please refer to the supplementary documentation provided here.
-
-
Microscope
-
Laser
-
Computer
-
-
-
Switch ON the "Power", "Laser", and turn the "Emission" key to "On-1" (control unit next to the microscope).
-
The LED (for fluorescence observation via the oculars) switches on automatically. No action needed.
-
Switch ON the PC.
-
-
-
Sign-in with your ZMB core credentials.
-
If you do not remember your password, you can reset it here
-
-
-
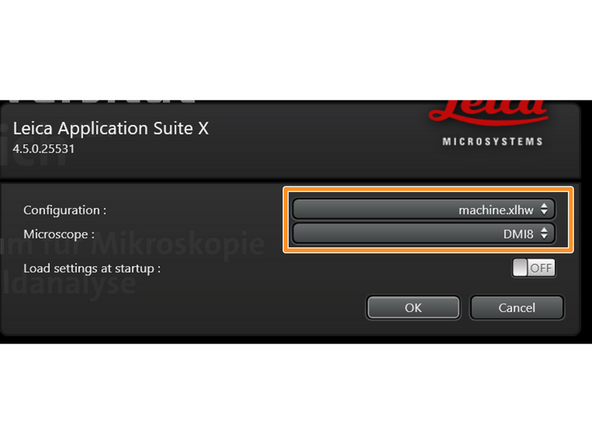
Start the "LAS X" software.
-
Make sure "machine.xlhw" is selected as "Configuration", and "DMI8" as "Microscope".
-
Click "OK".
-
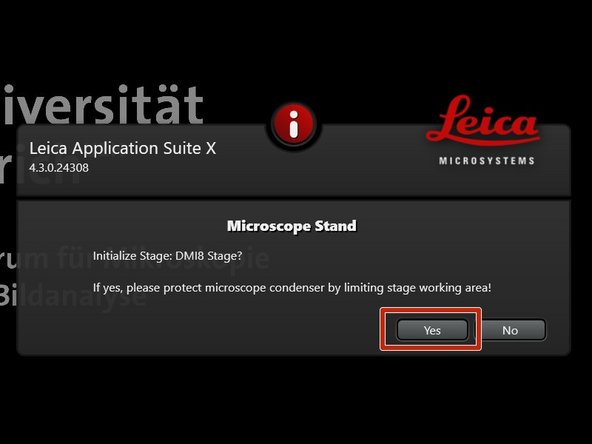
Click "Yes" in order to initialize the x/y stage. Please make sure nothing is placed currently on the stage.
-
x/y stage initialization is necessary to be able to use the "LAS X Navigator".
-
-
-
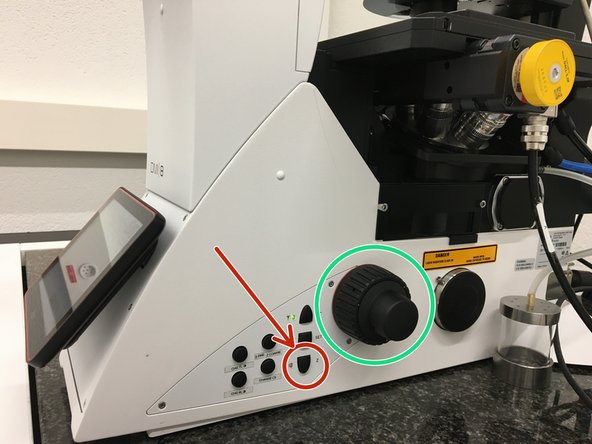
Lower the objective by keeping the "LOWER Z" button pressed on the right side of the microscope.
-
You can also turn the large knob until the stage does not go down anymore
-
This is a mandatory step as it avoids possible collision of the stage and objective during exchange of inserts and/or samples.
-
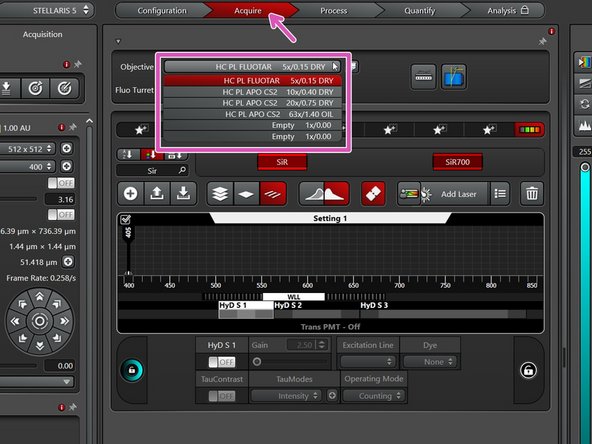
In the "Acquire" tab you can now toggle between objectives (drop-down menu).
-
Select the 10x dry objective for easy sample navigation and focusing.
-
In order to facilitate the focusing it is recommended to start with a low magnification dry objective.
-
-
-
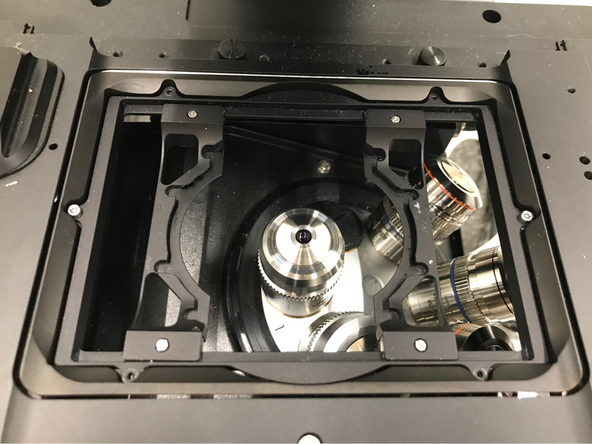
Make sure that the stage insert is correctly inserted and flat.
-
Here correct and flat.
-
Here not inserted correctly (stage not flat and shaky).
-
-
-
Push the condenser arm of the microscope back.
-
Insert your sample with the coverslip facing down .
-
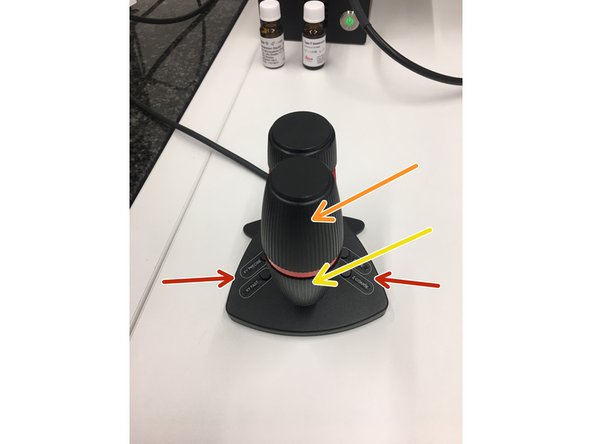
Move your sample under the objective with the help of the external controller "Smart Move".
-
Movement in y-direction.
-
Movement in x-direction.
-
Toggle between coarse movement "XY Fast" and slow movement "XY Precise".
-
Bring back condenser arm to its straight position.
-
-
-
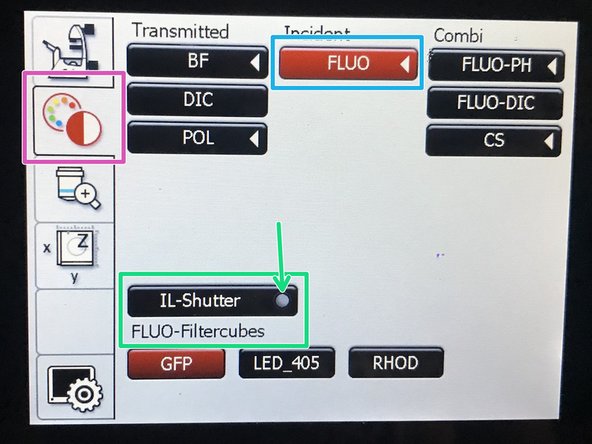
On the touch screen at the microscope stand choose the light path tab.
-
Click "FLUO" and choose an appropriate "FLUO-Filtercube" : e.g. "DAPI".
-
Open the "IL -Shutter" (if activated the dot is yellow).
-
Look through the oculars and focus your sample by using:
-
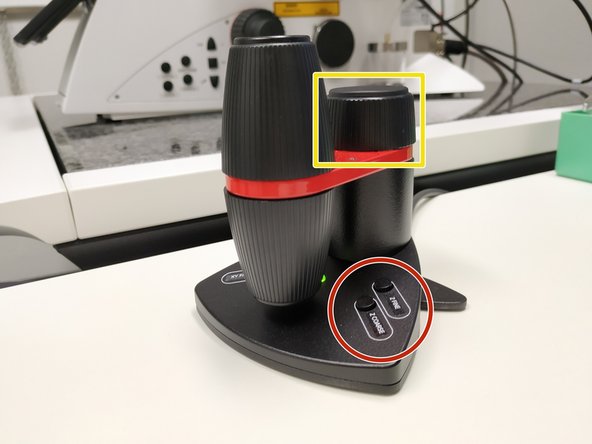
The z-wheel on the external controller ("Smart Move").
-
Moving objectives upwards (towards sample) turn z-wheels clockwise/away from you. Moving objectives downwards (away from sample) turn z-wheels counter-clockwise/towards you.
-
Toggle between "Z FINE" and "Z COARSE" directly on the "Smart Move".
-
-
-
The storage of the focal plane is helpful in order to find the focus back if the sample or objective will be changed.
-
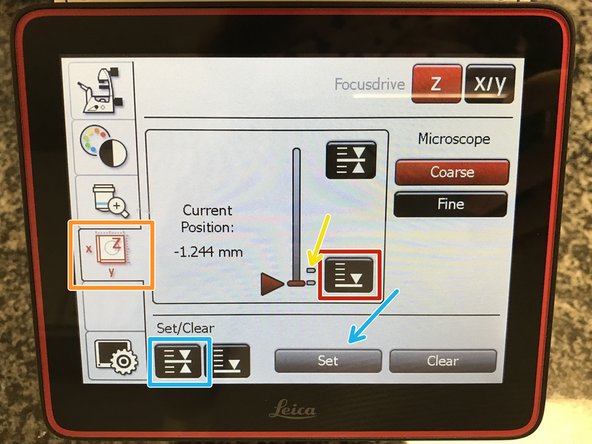
To save your current focus position select the "xyz tab" and the "Focusdrive Z" on the touchscreen of the microscope.
-
Click the "Upper Focus Limit" button.
-
Press "Set".
-
If done successfully you will see an upper marker line appearing.
-
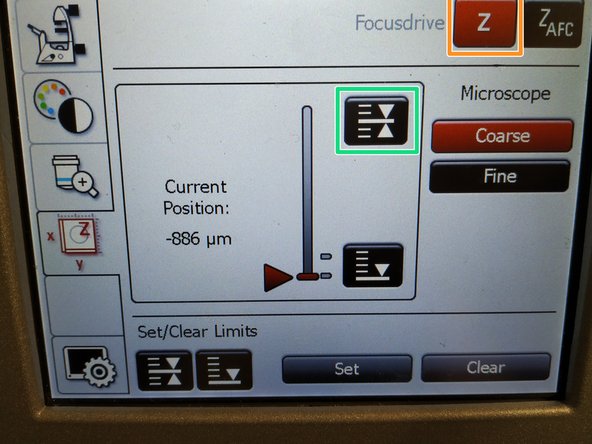
Press the "Lower Limit" button in order to move down (for safe change of the objective or the sample).
-
-
-
Lower the objectives, remove your sample and toggle within the software to the objective of choice.
-
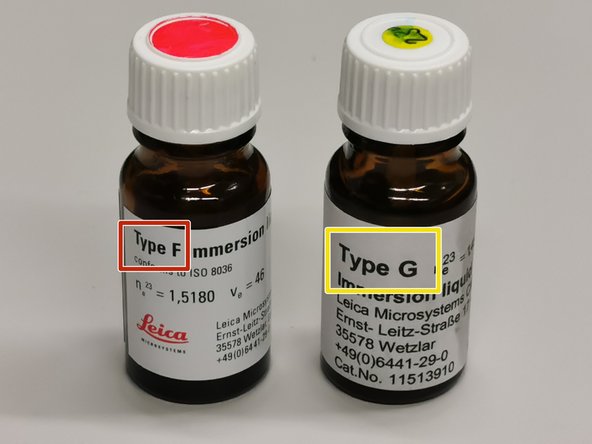
Depending on the objective different immersion media will be used. Apply directly on the sample.
-
Oil objectives: "Type-F" immersion liquid.
-
"Glycerin" objectives: "Type-G" immersion liquid.
-
"Water" objectives: ddH2O (always use fresh).
-
Mount your sample again and press the "Upper Focus Limit" button.
-
Remember, you can move (back and forth) the condenser arm for ease of access.
-
Focus your sample as described previously.
-
-
-
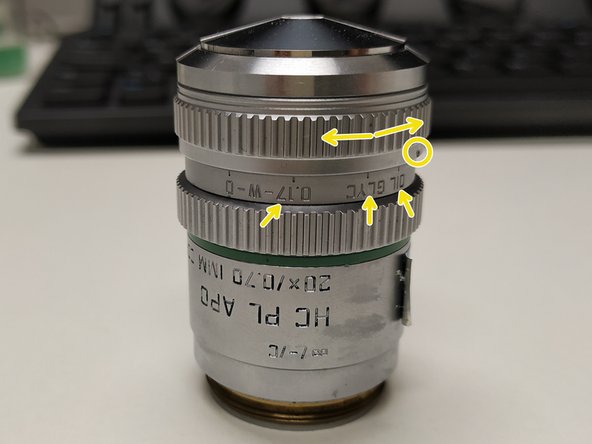
For optimal imaging performance on some objectives the correction collar has to be adjusted.
-
40x and 63x Gycerin objectives (Glycerin only) needs to be set by moving the black dot to the corresponding cover glass thickness
-
Make sure that the cap of the spring-loaded front lens is released (working position). (Please note: Displayed objective just an example, not exactly same as installed on system) .
-
Please, DO NOT remove the objectives for adjustment. They can be also accessed on the system.
-
The correct and standard cover glass thickness is: 0.17 mm = No 1.5
-
-
-
You are now ready to acquire your images. Please check the corresponding follow up guides.
-
-