Introduction
In this guide you learn how to start-up, mount a sample, find the focus as well as make an image using the Leica SP8 MP DIVE FALCON microscope.
It covers all the needed hardware aspects as well as introduces you to the LAS X software for acquiring and saving an image.
Since this microscope is mainly used for multiphoton excitation (MPE) and imaging, this guide will explain the start-up and imaging sequence using the 25x water immersion objective, the IR laser system and the external (RLD) DIVE detectors.
-
-
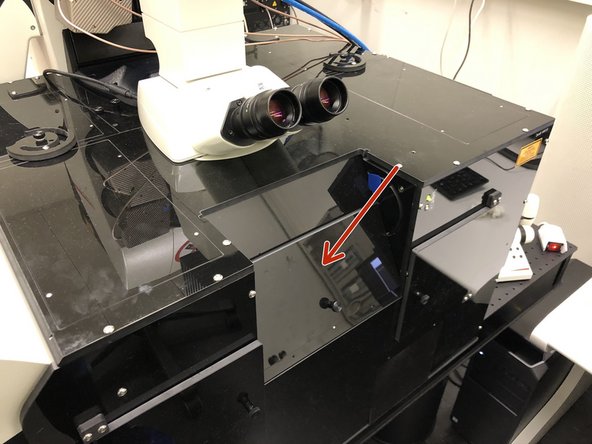
Only remove the front part of the box when needed for your experimental setup or when exchanging objectives (Explained in another guide).
-
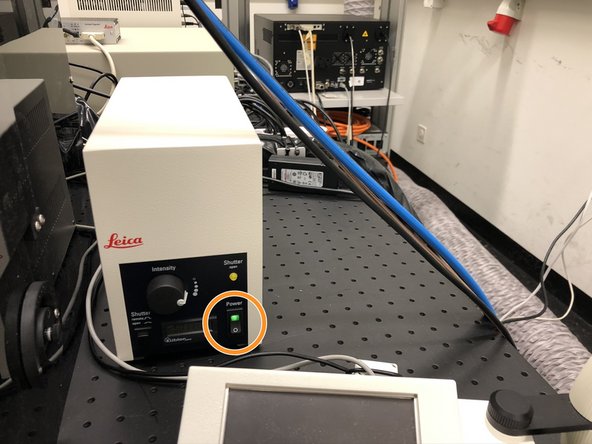
On the front switch you can turn on and off the internal lights and choose the light intensity.
-
When turned on, the light will be automatically engaged when opening the viewing window. Be extra careful with the detectors!
-
Before removing the front part be sure to perform the following steps inside the box:
-
unplug the power connector.
-
carefully detach the magnetic cable holders.
-
do not detach the non magnetic cable holders.
-
-
-
For removing the front part of the box open the 4 holding wheels.
-
Open the side door.
-
Hold the box above the detector as well as on the right corner and horizontally slide it away from the microscope.
-
The interior of this box is quite cramped. Be sure to very carefully place the objectives as well as your equipment.
-
-
-
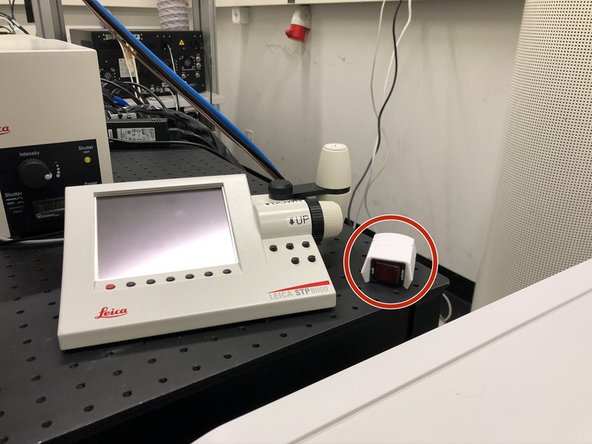
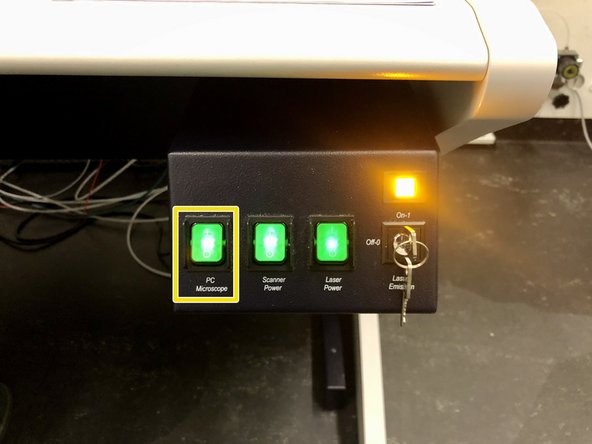
The correct turn on sequence is important for correct initialization of the microscope.
-
Turn on the remote switch and wait for 10s.
-
Switch on ONLY the PC button.
-
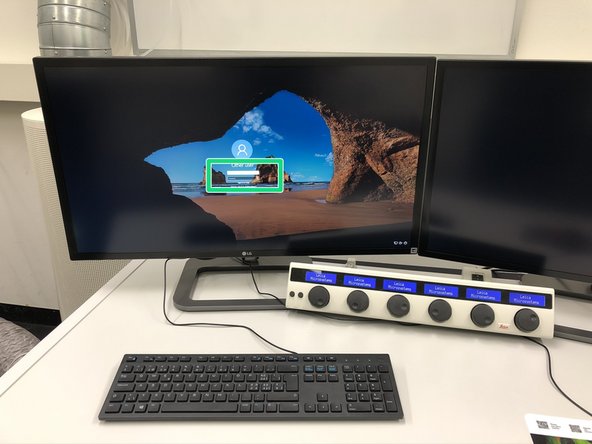
Log in and wait until the feedback form appears.
-
-
-
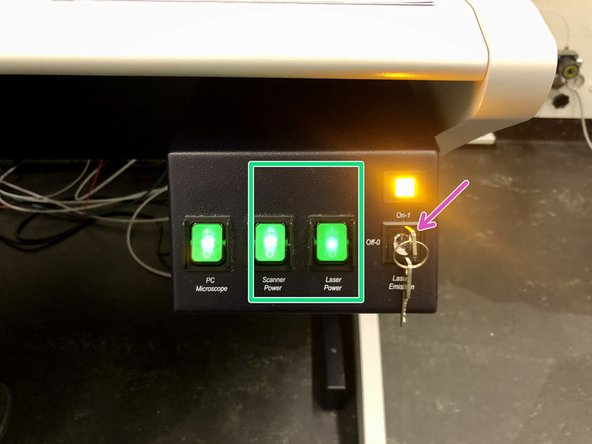
Switch on the “Scanner Power” and “Laser Power” buttons.
-
Switch the laser emission key to “On”
-
If you need widefield fluorescence (GFP filter only), turn on the fluorescence lamp.
-
-
-
Make sure the WLL is ready (green lights).
-
Go to the back of the room and make sure the scanner is ready (green light).
-
If either WLL or scanner are not ready within ~2min, switch off the laser emission key, "Scanner Power" and "Laser Power" (see previous step). Wait for 10s and switch them on again. If these steps still don't solve the problem, do a full restart.
-
-
-
Before starting the software be sure that the sample stage is safely away from the objective. Otherwise the stage might fatally crash into the objective during stage initialization.
-
To lower the stage open and lower the holding ring.
-
Next open the stage handle and move it away from the objective.
-
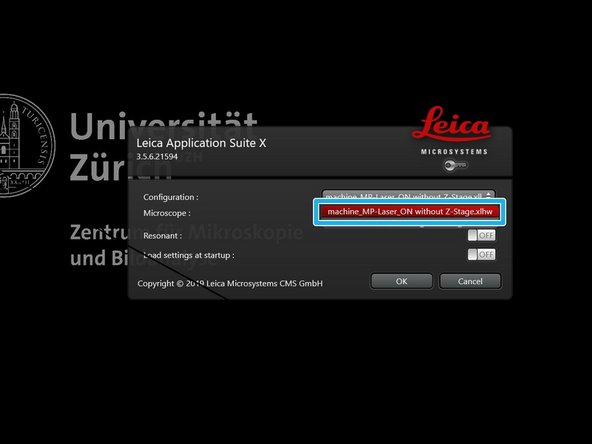
Start the "LAS X" software using the desktop icon.
-
Select the "machine_MP-Laser_ON without Z-stage.xlhw" hardware profile and press "OK".
-
If you'd like to use the "Navigator" option, do not forget to initialize the stage.
-
-
-
Please do this step in order to ensure correct start-up of the MP-laser!
-
Activate the tunable MP laser
-
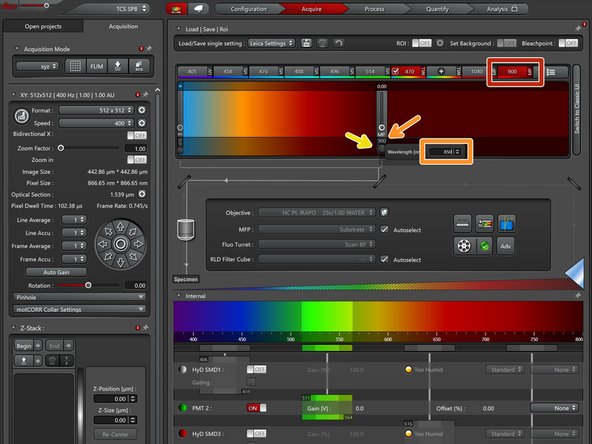
Double-click on the number to change the wavelength to 900nm.
-
At this step, the shutter etc. will still be grayed-out.
-
-
-
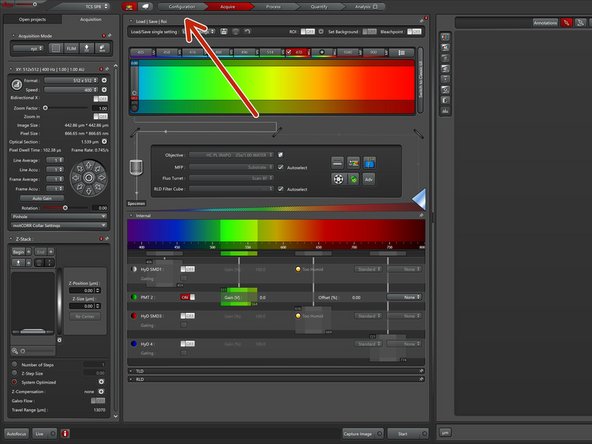
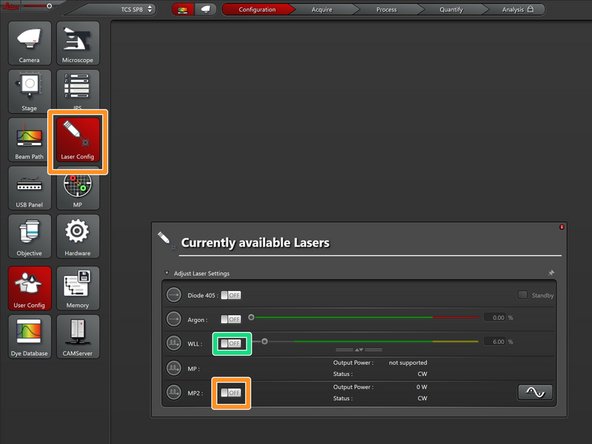
In the main window go to "Configuration".
-
In "Laser Config" turn on the "MP2" laser.
-
In "Laser Config" turn on the "WLL" laser.
-
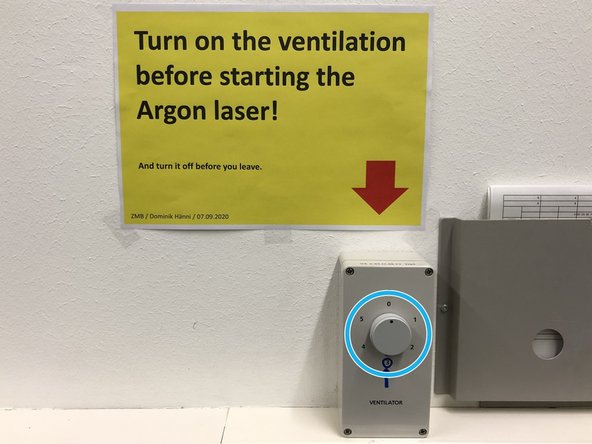
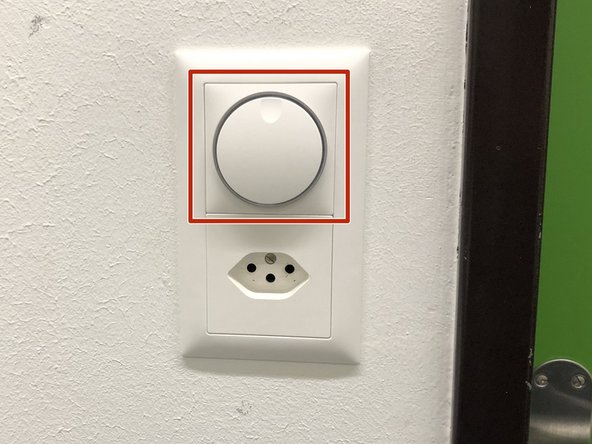
If you use the Argon laser for single photon confocal imaging, be sure to turn on the ventilation (wall mounted switch, position 3) before starting the laser!
-
-
-
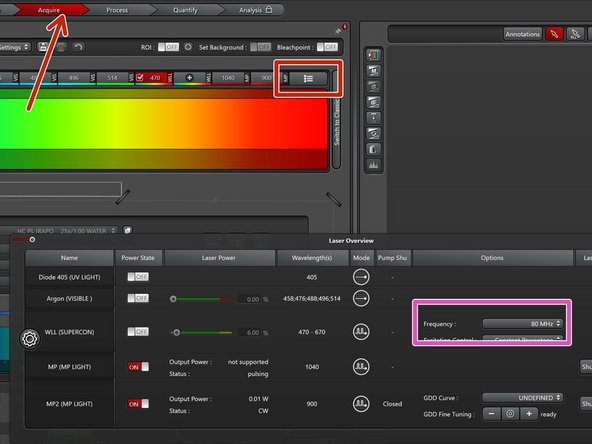
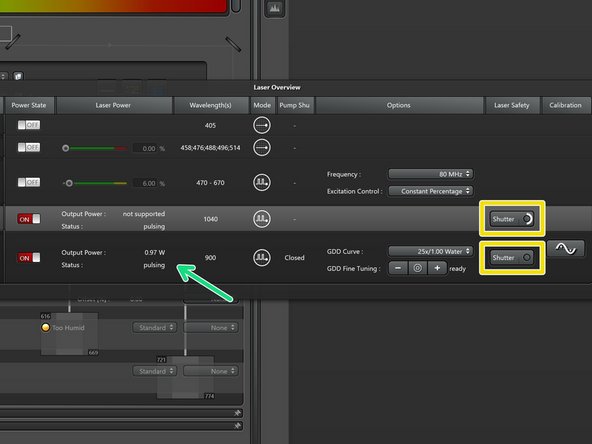
Go to "Acquire" and open the laser controls in the excitation window.
-
Set the "Frequency" of the WLL to 80 MHz.
-
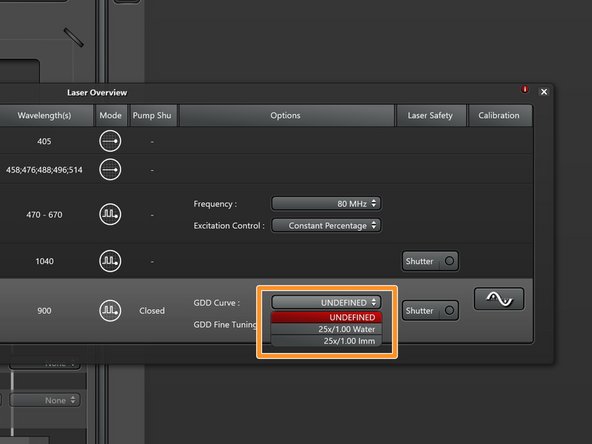
Select the appropriate GDD correction curve for the used multiphoton objective (25x/1.00 Water is the standard).
-
Make sure the laser is already pulsing and shows some power before trying to open the shutter.
-
Click and hold the "Shutter" button until the circle closes and the button turns red.
-
-
-
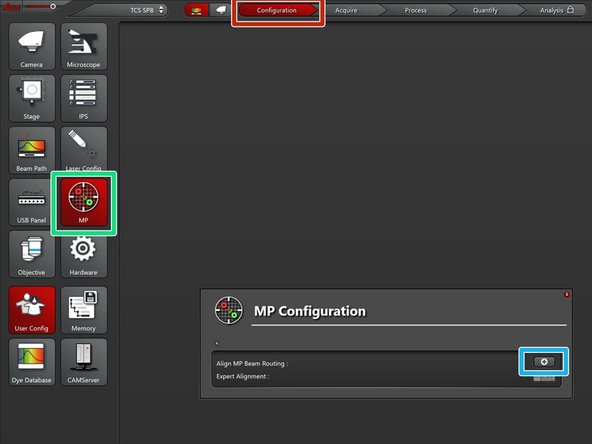
Go to "Configuration".
-
Go to "MP".
-
Click on the "+" symbol to start the coarse alignment procedure.
-
For this alignment procedure to work its important that both, the MPE as well as the WLL laser are turned on.
-
-
-
Select the tunable laser source (has to be red).
-
Double click on the indicated wavelength to open a context menu which allows for changing the excitation wavelength.
-
Engage the laser by clicking on the circle (also has to be red).
-
-
-
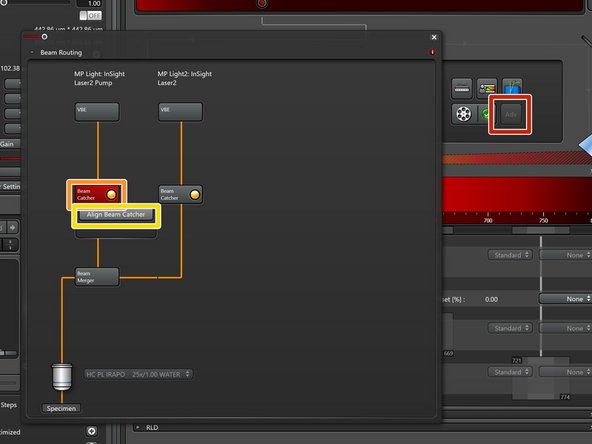
Open the "Beam routing" window by clicking the "Adv" button.
-
MP Ligth: Fixed 1040nm line / MP Light2: Tunable line.
-
Click on "Beam Catcher".
-
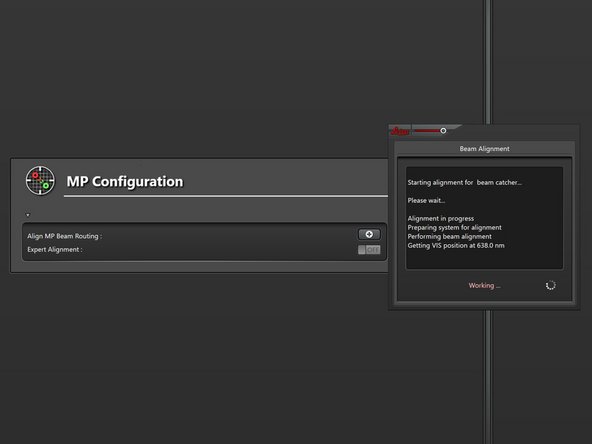
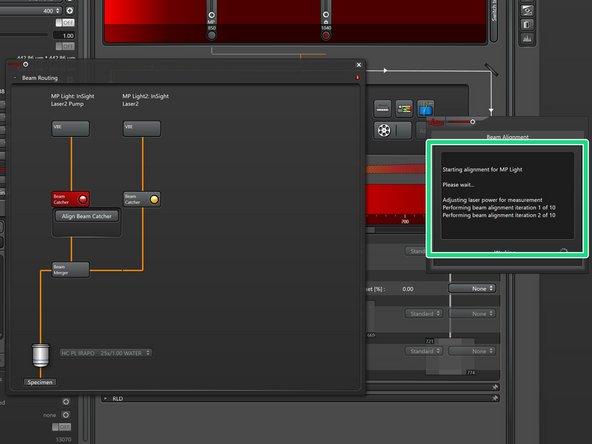
Click "Align Beam Catcher" to start the auto alignment.
-
The alignment progress is indicated in a status window.
-
Perform this step for both beams.
-
If successful both "Beam Catchers" should indicate green.
-
Close the "Beam Routing" window.
-
-
-
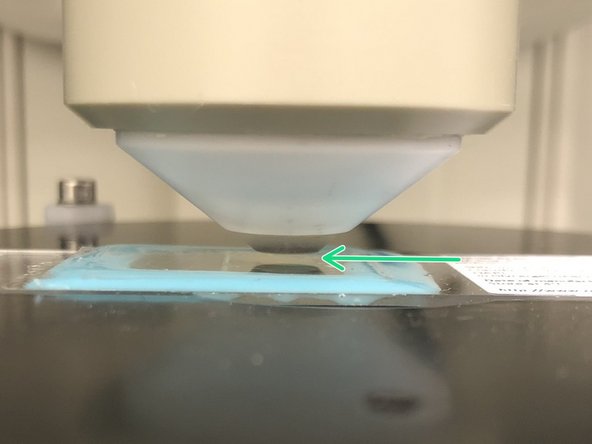
Mount a sample on the sample stage. Adjust the height of the stage if needed (The sample should be 5-10mm away from the front lens).
-
Use the controller to position your sample in
-
x/y.
-
z coarse.
-
z fine.
-
In order not to crash into the specimen when searching the focus, visually approach the sample as close as you can still see an airgap between the lens and the sample.
-
-
-
Add ddH20 for immersion. Long working distance objectives need plenty of immersion water.
-
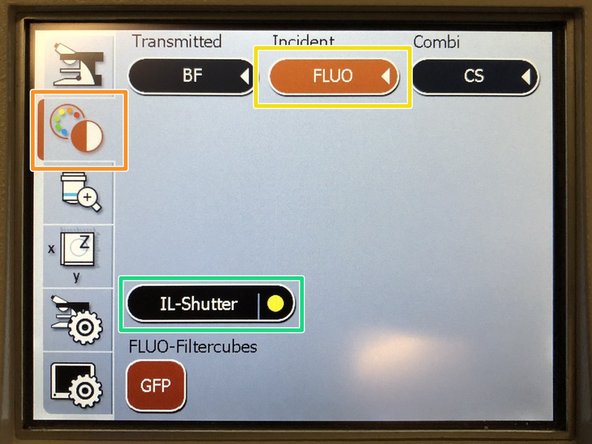
Almost all biological samples show a green auto fluorescence.
-
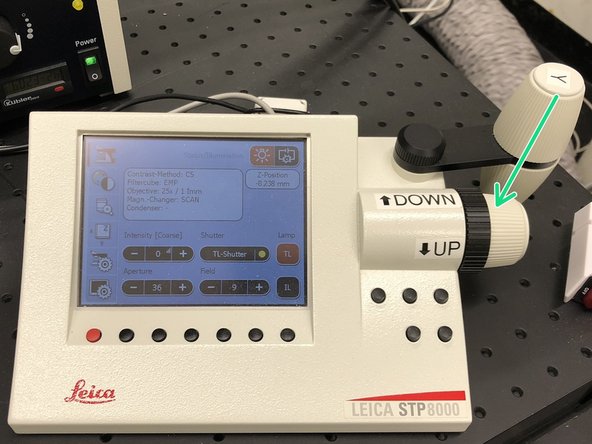
On the external controller press the filter selection.
-
Press "FLUO".
-
Engage the "IL-Shutter".
-
Look trough the ocular and slowly move the objective "Up" until you can see that the green signal increases and you can see some structures.
-
If you do not find the focus, try again by first approaching the sample by looking at the objective and not trough the ocular.
-
If you want to use transmission illumination for focusing on your sample, remove the protection cap before turning on the transmission light.
-
-
-
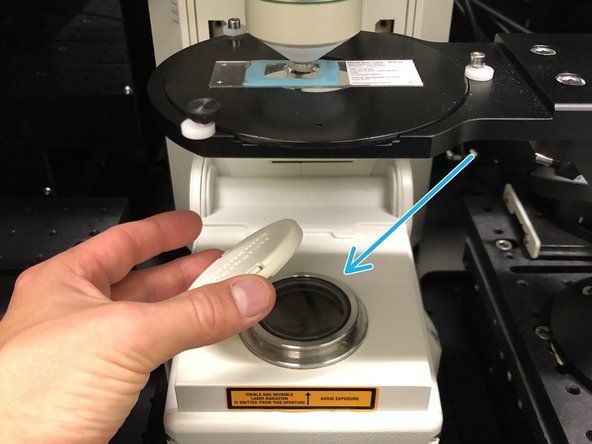
Before engaging the spectral detectors for multiphoton imaging be sure to close the hatch of the light insulation box and to turn off the room light.
-
Always turn the detectors off before manipulating samples or turning on any lights.
-
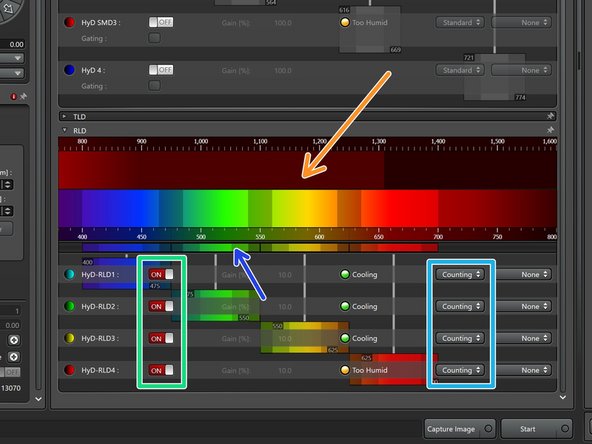
The lower set of detectors called HyD-RLDs are used for multiphoton imaging using the IR laser.
-
Turn them on.
-
We recommend to use them in photon counting mode.
-
Adjust the spectral detection windows by the sliders according to your experimental needs.
-
-
-
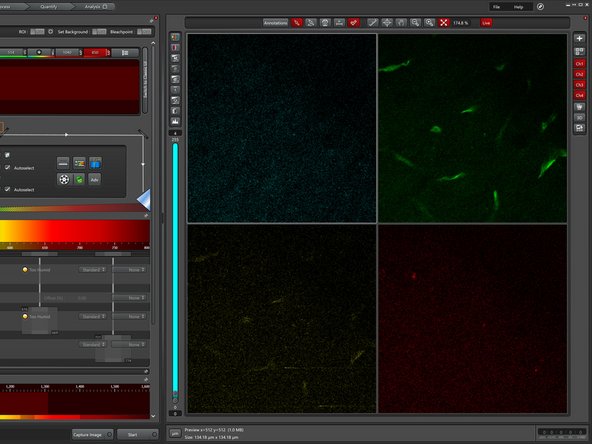
Click on "Live" to start image acquisition.
-
Turn on automatic image contrast adjustment.
-
Increase the laser power until you start seeing a singal.
-
Use the z-drive controls to adjust the focus.
-
Move the objective "Up" until you find the very top of your sample.
-
Long working distance objectives can be a bit tricky to find the focus. If you are unsure or lost your signal, turn of the detectors and check what's going on in the box.
-
-
-
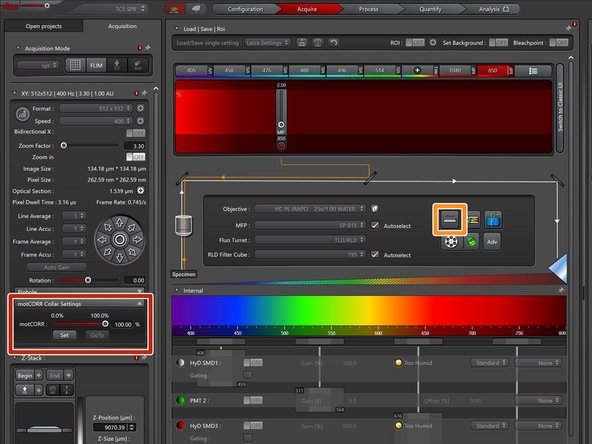
Proper adjustment of the objective correction collar is crucial for getting good imaging performance in multiphoton microscopy. For simple adjustments this microscope is outfitted with motorized collar rings.
-
Open the "motCorr" settings.
-
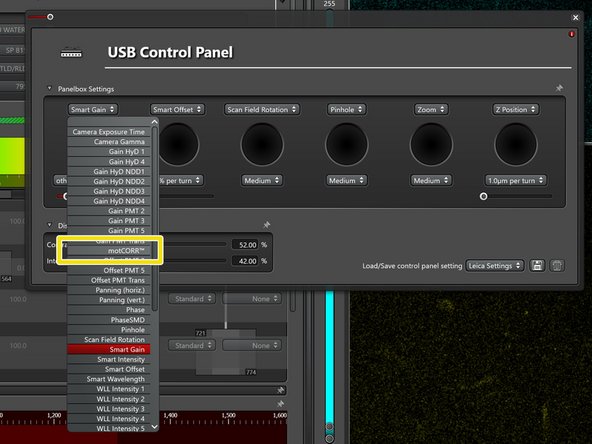
Open the settings for the external microscope controller (on the desk).
-
Add the "motCorr" controls to the external controller for simple adjustments.
-
Turn off auto contrast adjustment to be able to see absolute differences in the image intensity.
-
Go live and adjust the motCorr until the image is optimally bright and sharp.
-
Repeat this step whenever you put a new sample on the microscope.
-
-
-
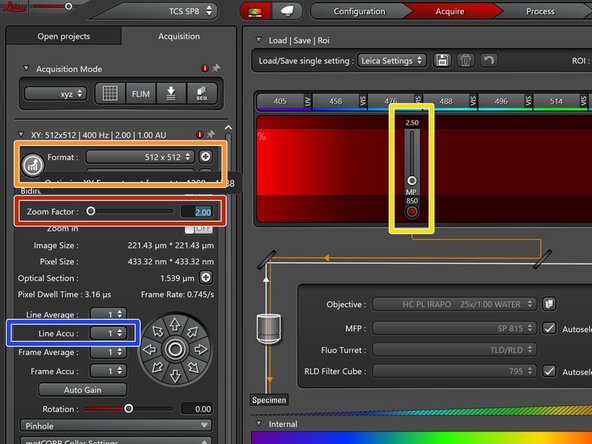
Adjust the "Zoom Factor" for optimally zooming on your sample.
-
Manually adjust the image format or click on the round button for automatic adjustment for optimal sampling.
-
Adjust the laser intensity for optimizing your signal as well as minimizing photodamage.
-
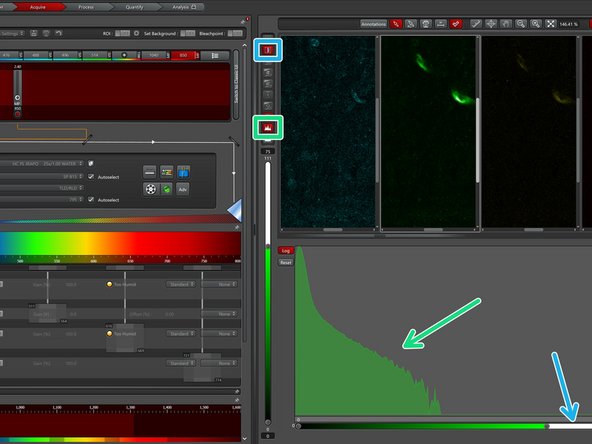
Open the image histogram to inspect the intensity distribution and to optimize your signal.
-
Activate the linear detector range lookup table to check for detector saturation.
-
If needed accumulate lines for increasing your signal.
-
-
-
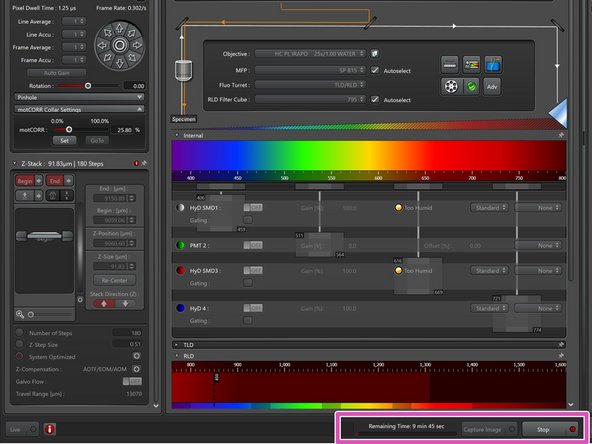
Use the external z-drive controller to define the "Begin" and the "End" of your z-stack.
-
Define the "Number of Steps", the "Z-Step Size" or go for optimal z sampling by choosing "System Optimized".
-
To compensate for loss of excitation laser intensity, increasing the laser power by going deeper into the tissue is a very common strategy when performing deep tissue multiphoton microscopy.
-
Open the "Z-Compensation" window and select "Compensation by Excitation Gain".
-
"Remove All" entries.
-
Adjust the laser intensity over the z-range of your stack and "Add" reference points. All laser powers in between will be interpolated when running the stack.
-
Start your experiment. The needed time will be indicated here.
-
-
-
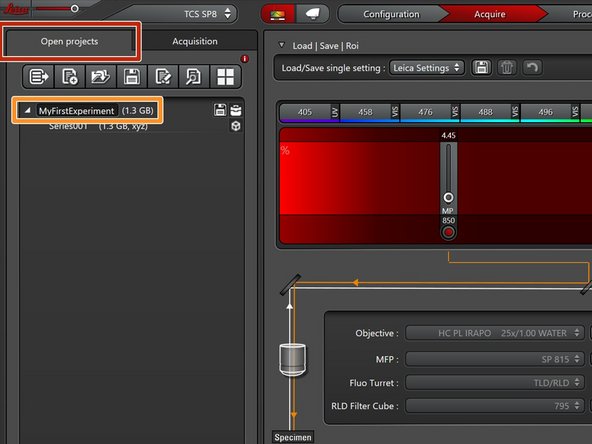
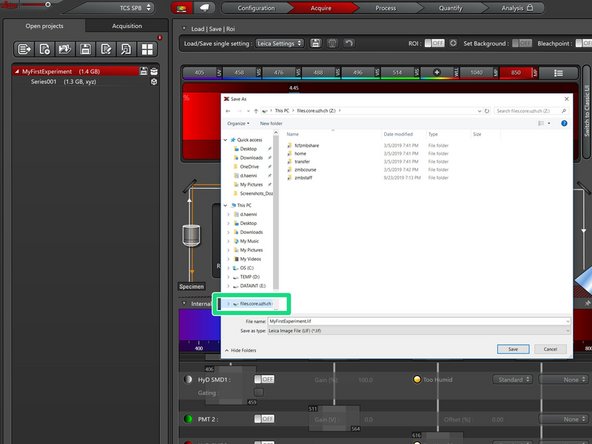
Go to the "Open projects" tab.
-
Click on your data file and give it a meaningful name.
-
Right click on the data file and "Save as..." for saving the data.
-
Save the data to your zmb-data network folder.
-