Introduction
In this guide of the Center for Microscopy and Image Analysis we describe how to set up the environmental control system for live cell experiments at the Leica SP8 confocal laser scanning microscope located at Research Center for Children, Lengg
-
-
Start heating at least 1 hr. before you start your experiment. This allows the chamber and the microscope components to heat up and avoids drift during your experiment.
-
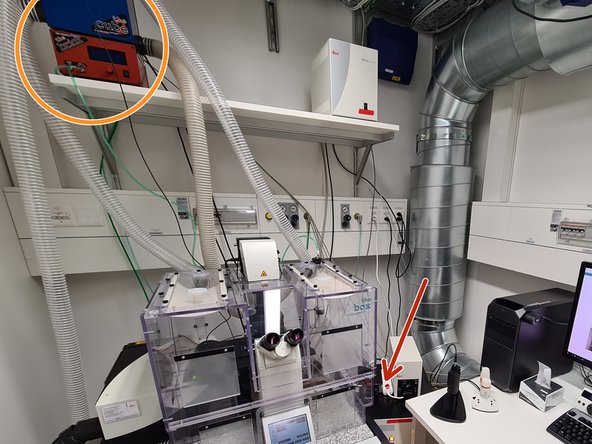
Identify the following components:
-
Temperature (cube) and CO2 controller (brick).
-
CO2 chamber (inside the box).
-
The humidifier.
-
Make sure the humidifier column is filled with water. If not, carefully refill with ddH2O. Don't overfill!
-
Use dishes or well plates suited for imaging. Preferably glass bottom.
-
Make sure your media does not interfere with the imaging - e.g. use media without phenol red.
-
-
-
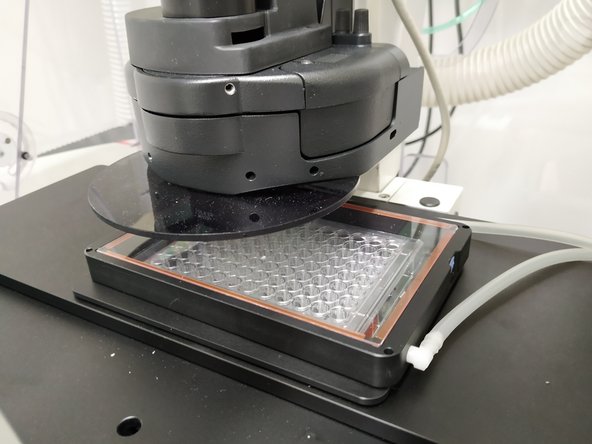
Place the frame on top of the stage. Make sure it is covered with the glass/plastic lid.
-
Adjust the condenser height in case it touches the top of the lid.
-
-
-
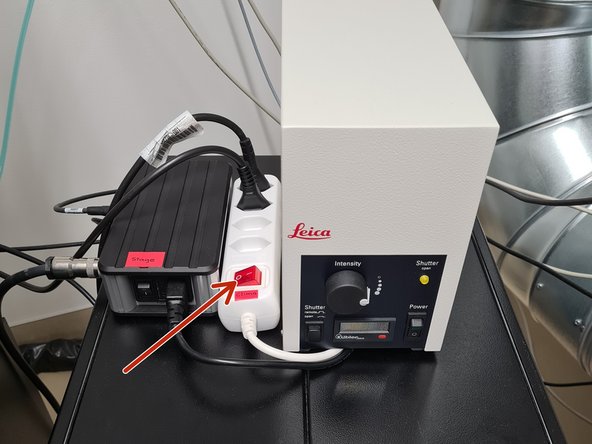
Turn on the power switch.
-
The Cube (temperature) and brick (CO2) should already be turned ON. Otherwise turn them on.
-
The brick needs a couple of minutes for being initialized.
-
-
-
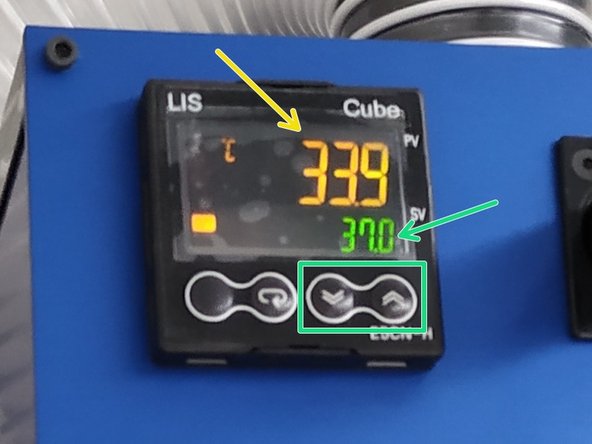
37° C are set as a standard configuration. If you change it, please set it back to 37° C at the end of your experiment!
-
The desired temperature can be defined by pressing the arrow buttons.
-
The yellow number (top) indicates the current temperature measured inside the incubation chamber.
-
-
-
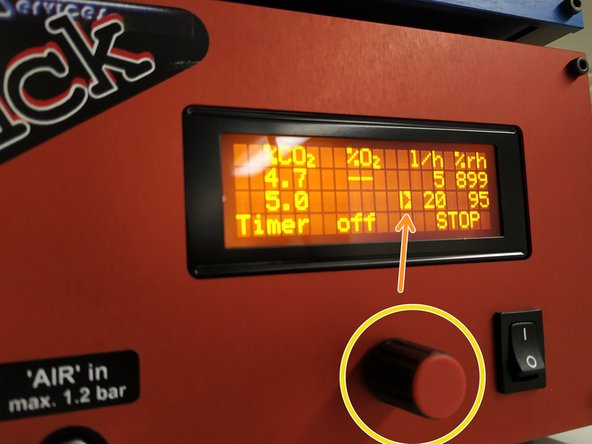
After turning on, the gas flow should start automatically.
-
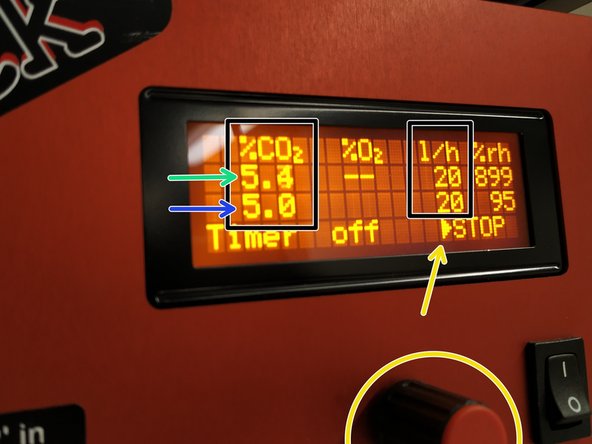
5% CO2 and a flow of 20l/h are set as standard. If you need to change it, please set it back at the end of your experiment!
-
The second row displays the current readings.
-
The third row indicates the chosen settings.
-
For changing settings:
-
Turn the knob to navigate through the options/set values. The small arrow indicates where you are.
-
Press the knob to select the desired option - indicated by an "inverted" arrow.
-
Turn the knob to define the desired value. By pressing it again the new value is set.
-
-
-
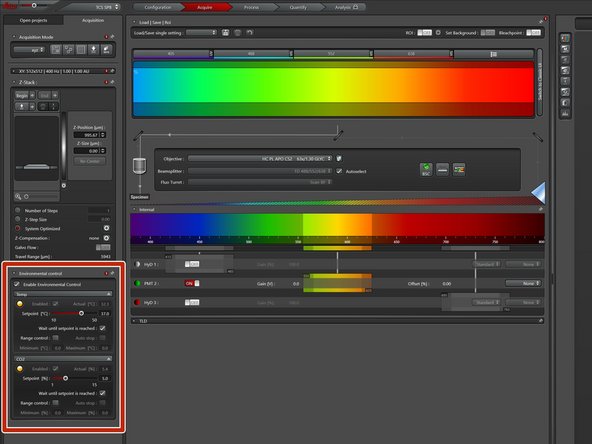
If the hardware configuration "machine_with_ClimateControl.xlhw" has been chosen during the "LAS X" start-up, the Temperature and CO2 values can also set and logged via the "LAS X" software.
-
Open the Environmental Control tab.
-
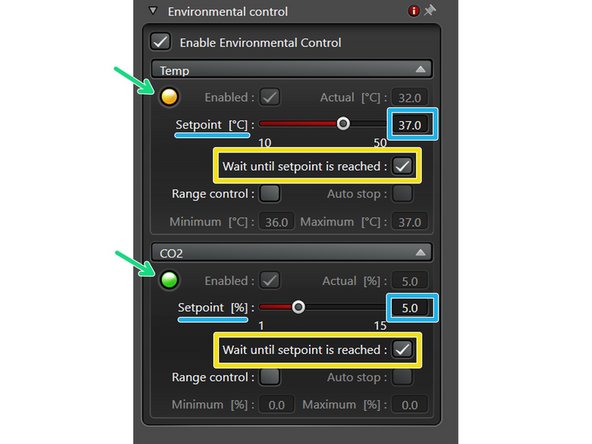
Set the desired temperature and CO2 value via the slider or by typing the value.
-
If the set value is reached, it is indicated by a green light. When still adjusting, the indicator light shows orange.
-
Check if your time-lapse experiment should only start when the set values have been reached.
-
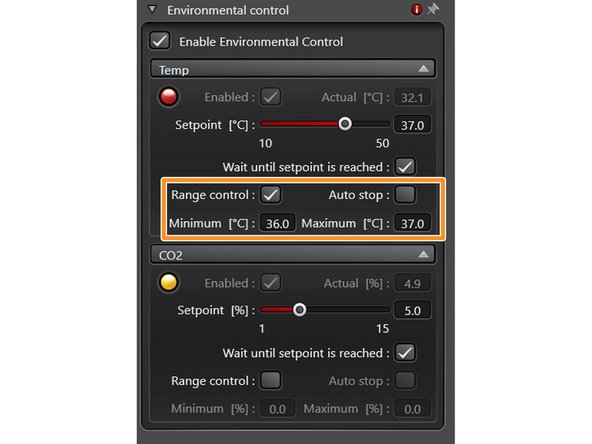
It is also possible to define a range where experiments are allowed to start.
-
If the measured value is not in the defined range it is indicated by a red indicator light, otherwise green.
-
-
-
Wait until the CO2 concentration and temperature has stabilized (approx. 30 min).
-
Next mount your sample.
-
Set up your imaging experiment.
-


