Introduction
How to start up Leica SP8 confocal laserscanning microscope located at the Research Center Children's hospital.
Please find detailed information about the system setup here.
-
-
The microscope stand is always on for stability reason. Never turn it off!
-
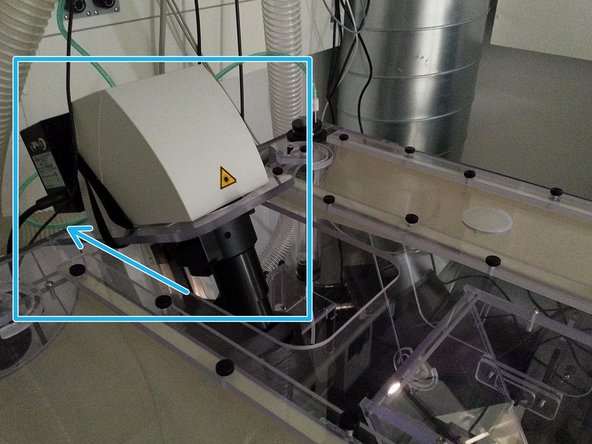
The corresponding microscope control box can be found on the shelf above the microscope.
-
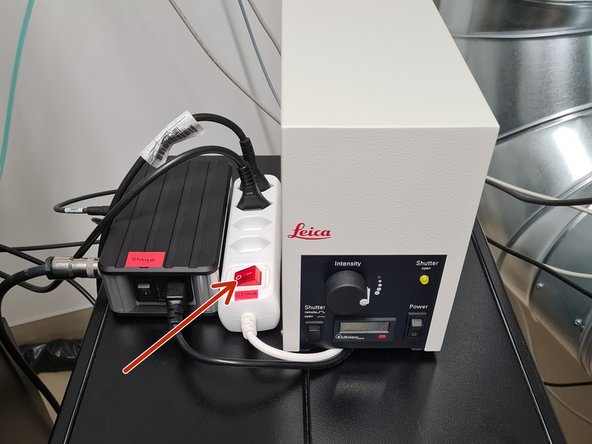
Switch ON the fluorescence lamp.
-
Press the main power switch mounted with a magnet on the top of the computer.
-
PC, scanner, lasers will be switched on. If not,
-
check on the control unit that the "Scanner Power" and "Laser Power" are switched on, and the "Laser Emission" key turned to "On-1".
-
-
-
Sign-in with your ZMB core credentials.
-
-
-
If you would like to perform live cell imaging, please refer to the dedicated guide for more detailed instruction.
-
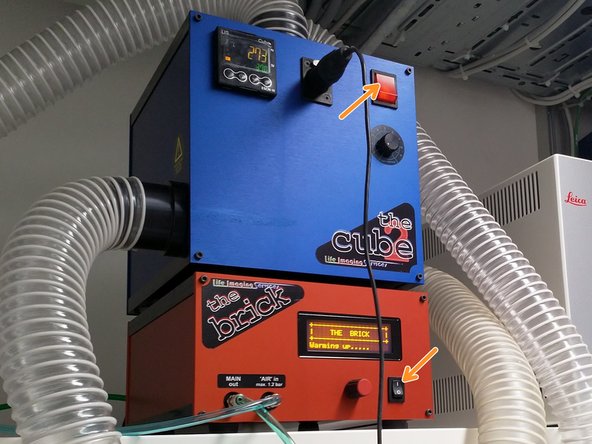
In brief, Turn ON the power switch.
-
Cube (temperature) and brick (CO2) are already turned on.
-
37° C and 5% CO2 are set as a standard. If you need to change it, please set it back to 37° C and 5% CO2 at the end of your experiment!
-
-
-
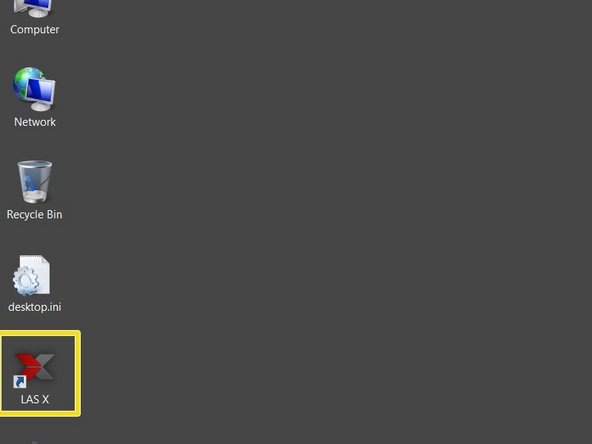
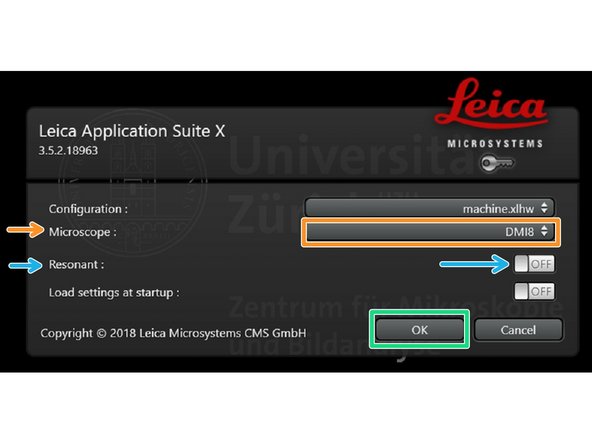
Start the "LAS X" software.
-
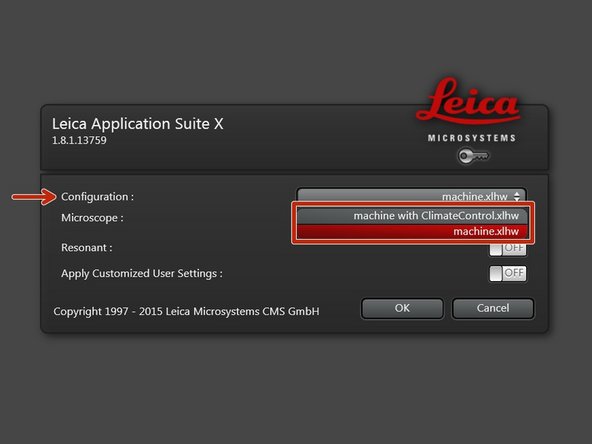
Select the appropriate "Configuration".
-
"machine with ClimateControl.xlhw" if environmental control is applied and needs to be logged via the software. Make sure the needed components have been switched on (see dedicated guide for live cell imaging).
-
"machine.xlhw" for standard room temperature (RT) measurements. Please note, environmental control can be also applied here (however, here temperature and CO2 will be not logged via software).
-
Make sure "DMI8" is selected as "Microscope".
-
Select either "Resonant" (ON) or non-"Resonant" (OFF) scanning mode.
-
Click "OK".
-
-
-
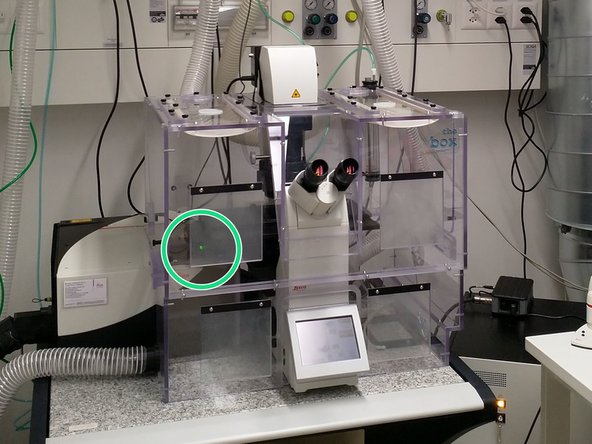
Please note: The x/y stage at this microscope does not need any initialization to function!
-
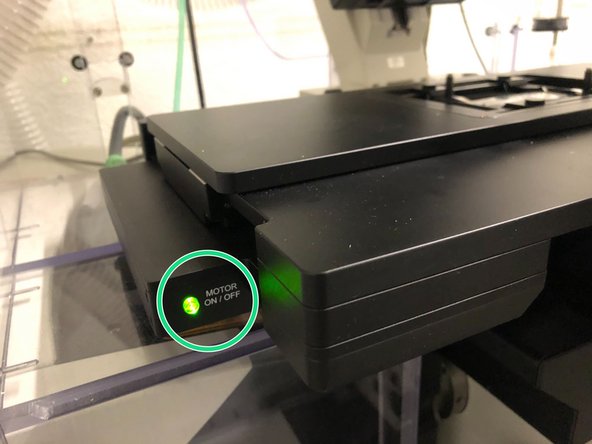
The indicator light "MOTOR ON/OFF" at the stage (left hand side) must be green continuously.
-
Flashing green light at the stage indicates the stage was disengaged by touching or manual movement. Press the green light button to activate it again.
-
-
-
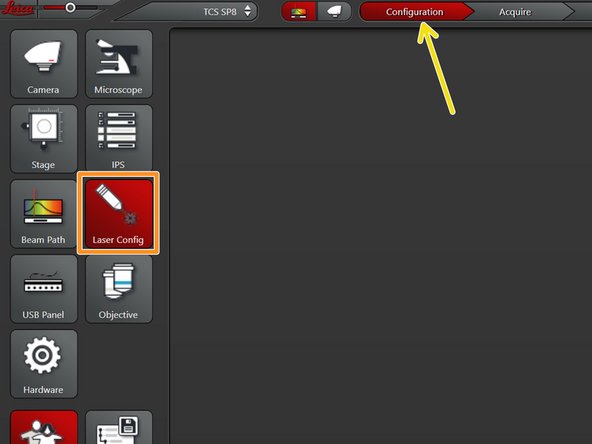
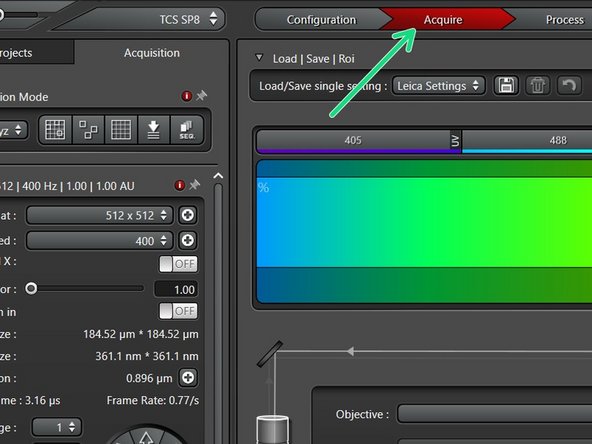
Go to "Configuration".
-
Select "Laser Config".
-
Switch "ON" the lasers you will need.
-
Go back to "Acquire".
-
-
-
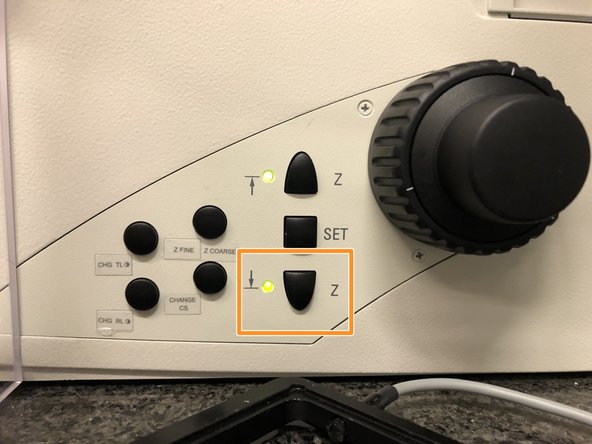
Lower the objective turret by pressing the downwards "Z" button on the right side of the microscope.
-
This is a mandatory step as it avoids possible collision of the objectives and stage during exchange of inserts and/or samples.
-
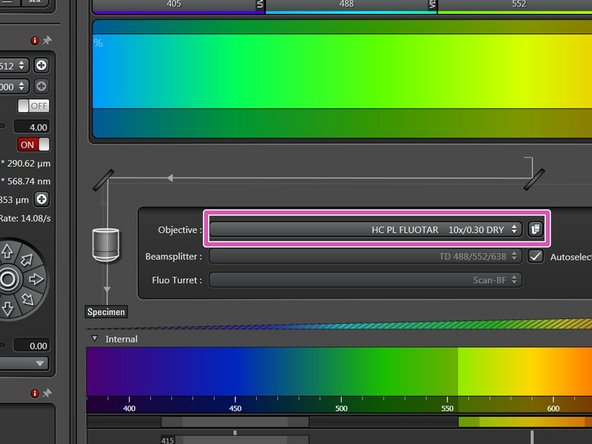
You can now toggle between objectives within the software (drop-down menu).
-
Select the 10x dry objective.
-
In order to facilitate the focusing it is recommended to start with the 10x dry objective.
-
-
-
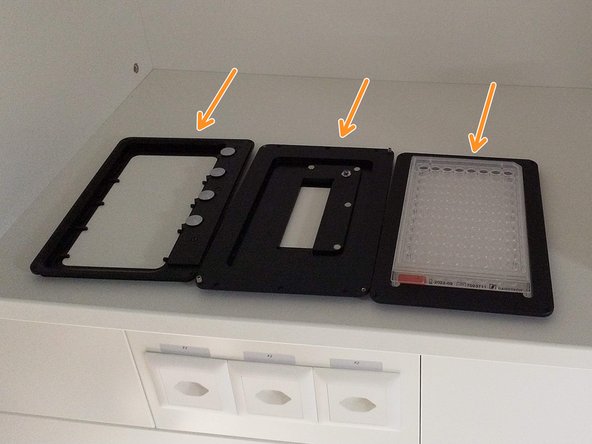
Usually, a universal insert for slides and petridishes is already installed.
-
Additional stage inserts can be found in the cupboard.
-
Push the condenser arm of the microscope to the back and, if necessary install a different stage insert.
-
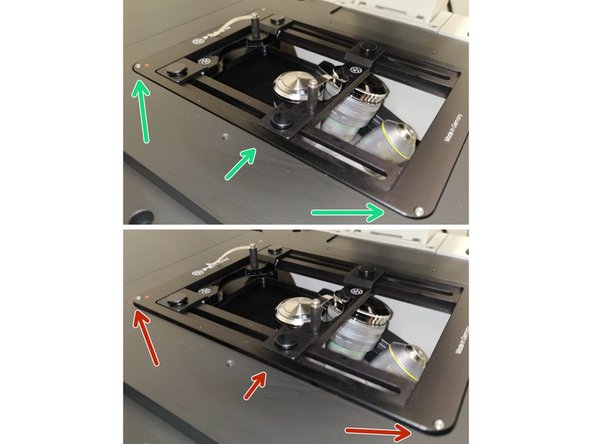
Make sure that the stage insert is correctly inserted and flat.
-
Here correct and flat.
-
Here not inserted correctly (stage not flat and shaky).
-
The stage might disengage while installing the stage insert. Press the flashing green light button again as already mentioned previously.
-
-
-
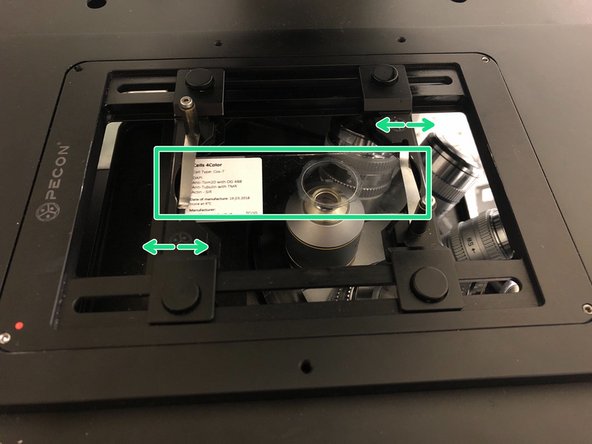
Insert your sample with the coverslip facing down.
-
Adjust the variable clamping range and moveable brackets to properly fix your sample.
-
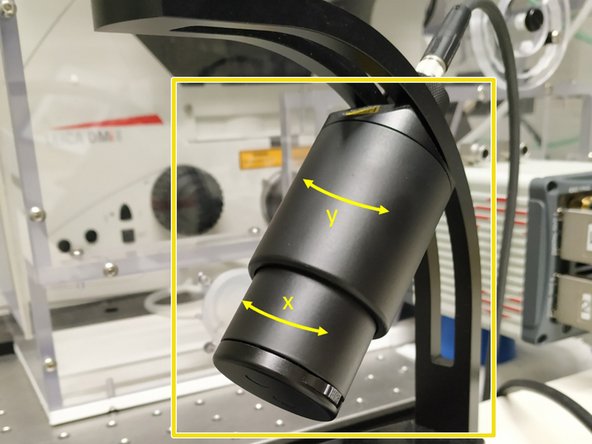
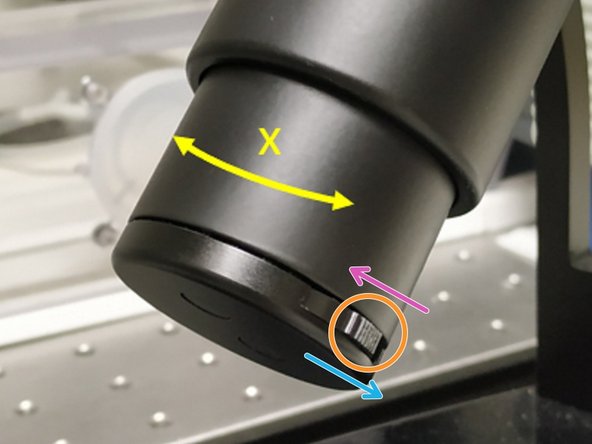
Move your sample over the objective with the help of the Joystick.
-
With the little slider knobs on both sides of the lower wheel you can change between fast and slow movement.
-
Fast movement - pressing the knobs downwards.
-
Slow movement - pulling the knobs towards you.
-
Bring back the condenser arm to its straight position.
-
-
-
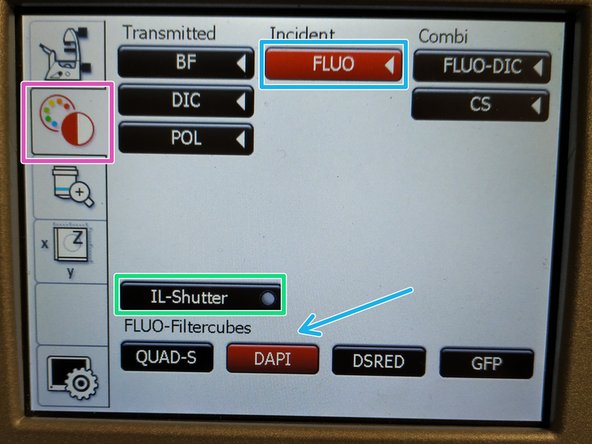
On the touch screen at the microscope choose the light path tab.
-
Click "FLUO" and choose an appropriate "FLUO-Filtercube" e.g. "DAPI".
-
Open the "IL-Shutter" (if actived the dot is yellow).
-
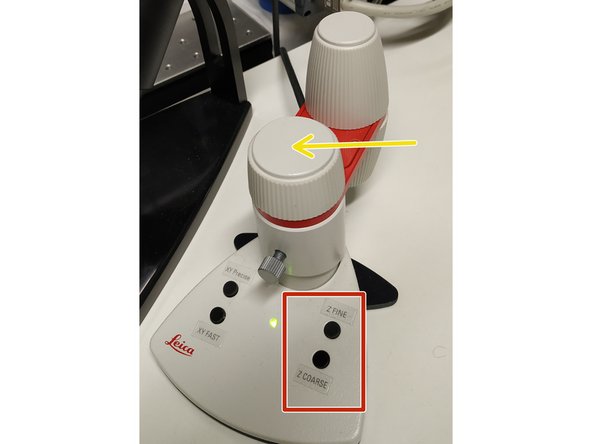
Look through the oculars and focus your sample by using:
-
the focus wheel on the microscope stand,
-
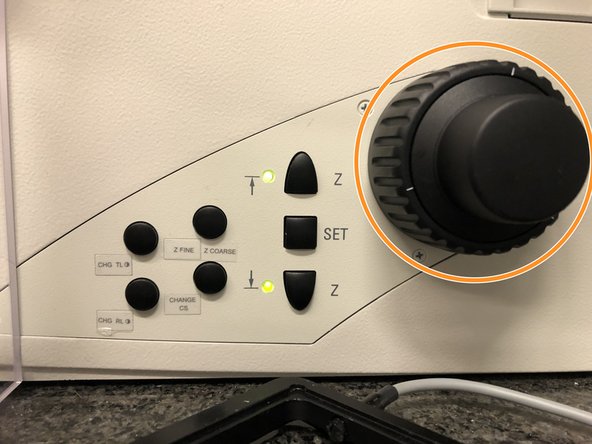
or the z-wheel on the external controller (Smart Move).
-
Moving objectives upwards (towards sample) turn z-wheels clockwise/away from you. Moving objectives downwards (away from sample) turn z-wheels counter-clockwise/towards you.
-
Toggle between "Z FINE" and "Z COARSE" directly on the Smart Move.
-
-
-
The storage of the focal plane is helpful in order to find the focus back if the sample or objective will be changed.
-
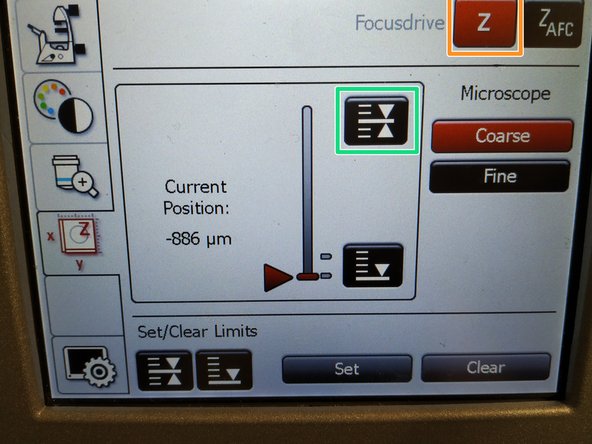
To save your current focus position select the "xyz tab" and the "Focusdrive Z" on the touchscreen of the microscope.
-
Click the "Upper Focus Limit" button.
-
Press "Set".
-
If done successful you will see an upper marker line appearing.
-
Press the "Lower Limit" button in order to move down (for safe change of the objective or the sample).
-
-
-
Remove your sample and toggle within the software to the objective of choice.
-
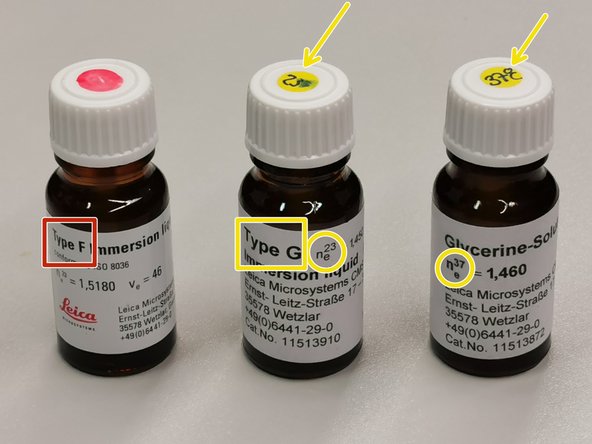
Depending on the objective different immersion media will be used. Apply either on the sample or directly to the objective.
-
Oil objectives: "Type-F" immersion liquid.
-
"Glycerin" objectives: either "Type-G" immersion liquid (for RT measurements) or "Glycerin" immersion liquid (for measurements at 37°C).
-
"Water" objectives: ddH2O (always use fresh).
-
Please further consider the additional information in the next step to guaranty proper image acquisition.
-
Mount your sample again and press the "Upper Focus Limit" button.
-
Focus your sample as described previously.
-
-
-
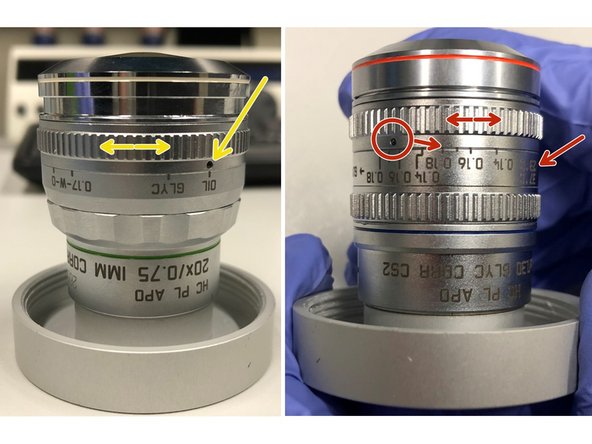
For some objectives the correction collar has to be adjusted.
-
20x IMM (multi-immersion - Oil, Glycerin or Water) needs to be set to the corresponding immersion media ("OIL", "GLYC" or "0.17-W" (with cover glass) or "W-0" (without cover glass)).
-
63x glycerol you can correct for the cover glass thickness (0.14-0.18 mm). Standard is usually 0.17 mm.
-
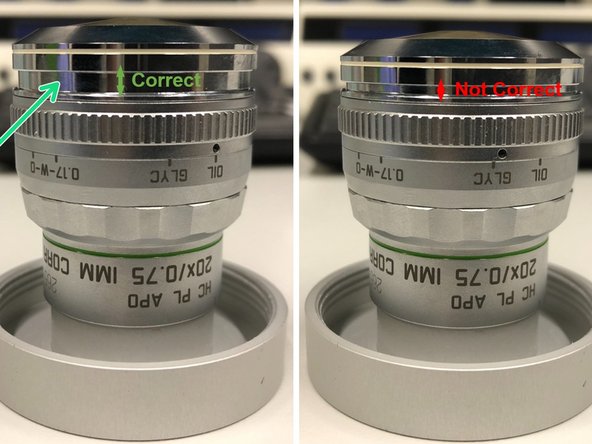
Make sure that the cap of the spring-loaded front lens is released (working position).
-
Please, DO NOT remove the objectives for adjustment. They can be also accessed on the system.
-
-
-
Update: System connected to Network again.
-
Please save your data from now again on your core storage (network path: \\files.core.uzh.ch\).
-
Please follow the instructions on our webpage how to access your data.
-
Imaging settings: you can load settings from already acquired/stored data.
-