Introduction
This guide of the Center for Microscopy and Image Analysis shows the use of the Navigator on a Leica CLSM SP8 and Stellaris5 for getting an overview over the sample and setting different points for data acquisition. For the acquisition of tile scans, please refer to the guide '''Leica LAS X Navigator - Merge regular and irregular shapes'''.
-
-
Set up your basic image acquisition for an overview. If you need a big overview (different tissue slices, well plates, etc.), consider using a low magnification dry objective (eg 10x) before applying immersion media.
-
For the fastest overview, zoom out using the smart wheel on the panel bellow the computer monitor.
-
Make sure you initialized the stage during the startup. For more info refer to the the microscope startup guide.
-
Start the Navigator by clicking on the symbol.
-
A new window appears with the pannels accessible on the left.
-
-
-
Go to the "Carrier" tab.
-
Choose your sample type from one of the drop-down menus.
-
A preview of your sample holder with your sample (here, a coverslip on a slide) is shown.
-
In the main window, you see a bigger version of it with a little square marking the position of your field of view.
-
Gently move in x/y with the external controller "Smart Move" in "XY Precise" mode and observe the square moving.
-
Please be aware that this unaligned mode only gives you an idea where you are. Make sure to always stay in the indicated area to avoid crashing of the objectives.
-
If you want to align your sample , click on "Align" and follow the instructions (best done with a 10x objective).
-
-
-
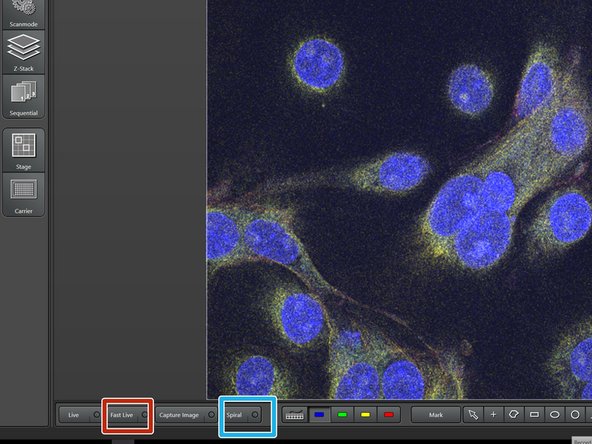
Use "Fast Live" to get a preview of the region you are currently imaging.
-
Use the mouse left button and drag to navigate to a different stage position. With the mouse wheel you can zoom in and out.
-
Double click (left mouse button) on the current position to get a snapshot of this position.
-
Click on "Spiral" go get a quick overview of the sample with the field of view spiraling out.
-
Press "Stop" once you are happy with the overview area.
-
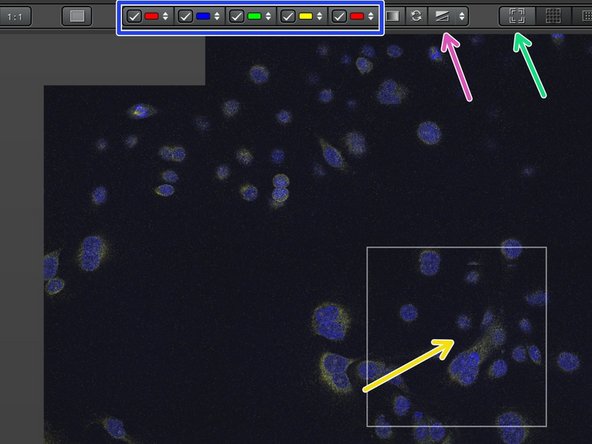
Choose which channels should be displayed using the check boxes.
-
Here you can Auto-scale the channels.
-
Center your current field of view if you ever get lost.
-
-
-
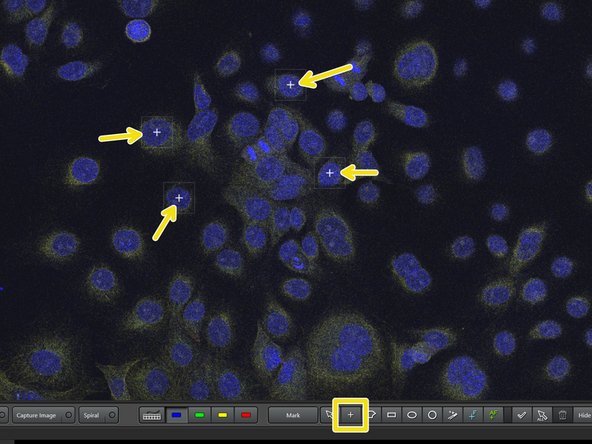
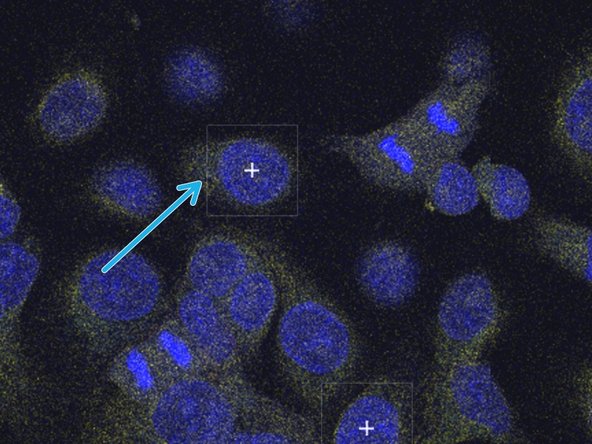
Select the areas that you want to measure via the "Point Selection Tool".
-
Use the Zoom wheel in the smart panel bellow the computer monitor to zoom in (smaller square).
-
Or out (larger square).
-
Be aware that the image pixel size and thus resolution changes accordingly.
-
-
-
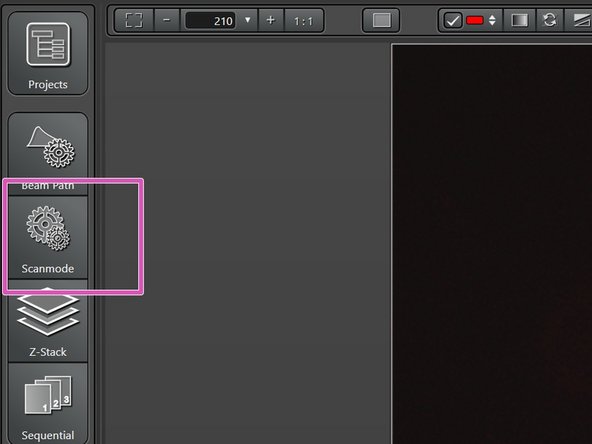
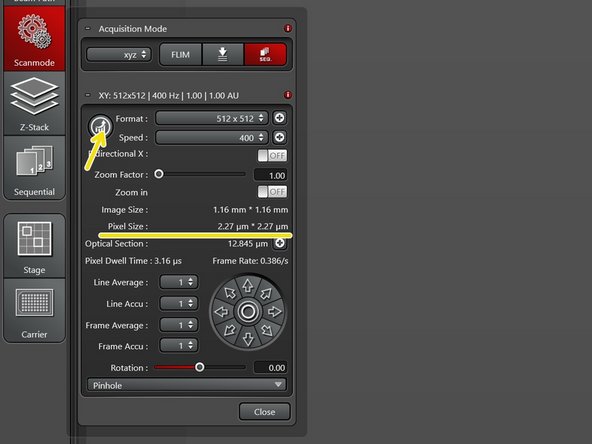
You can adjust your image settings through the "Scanmode" panel on the left and using the "Live"-button (gives you a preview with the actual imaging parameters).
-
Proper xy sampling (pixel size) is crucial for acquiring optimal images.
-
To adjust for the correct pixel size you can either use the online calculator such as the SVI Nyquist Calculator or the auto button for an estimate.
-
Make sure laser intensity, line/frame accumulation/averaging are appropriate for the new format. Once you are happy you can start your image acquisition by pressing "Start".
-
-
-
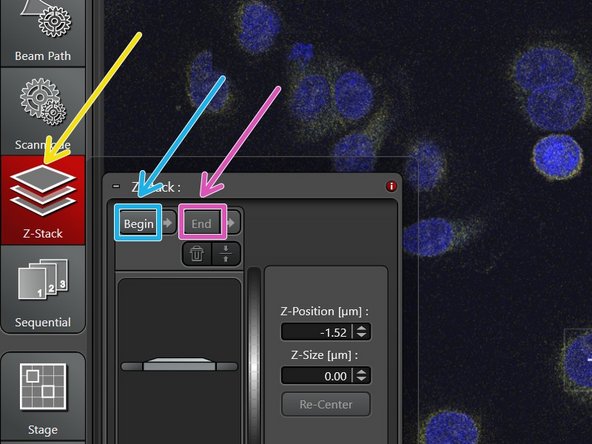
Define your Z-stack settings.
-
Use the smart wheel on the panel to go to the top of your sample and press "Begin".
-
Go to the bottom and press "End".
-
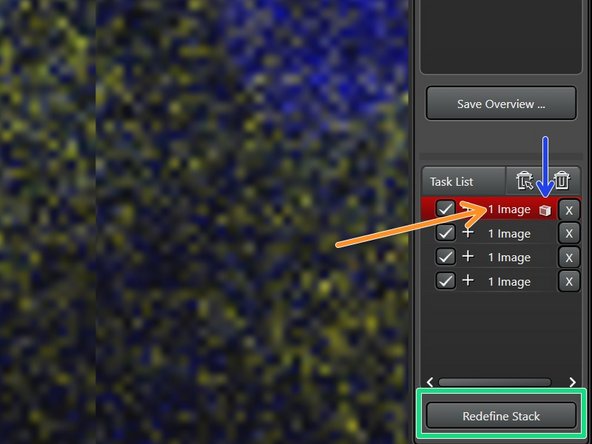
If you want to define the Z-stacks individually for each area, make sure the Same Stack Size for all Regions is "Off".
-
Go to the regions by double-clicking and repeat the steps above.
-
After defining beginning and end, click "Redefine Stack".
-
A symbol appears indicating the redefined stack.
-
Now you can start your image acquisition by pressing "Start".
-
-
-
For more information on tile scans, please refer to the guide "Leica LAS X Navigator".
-
If your sample is not 100% flat, it can happen that for tile scans not all the parts are in focus.
-
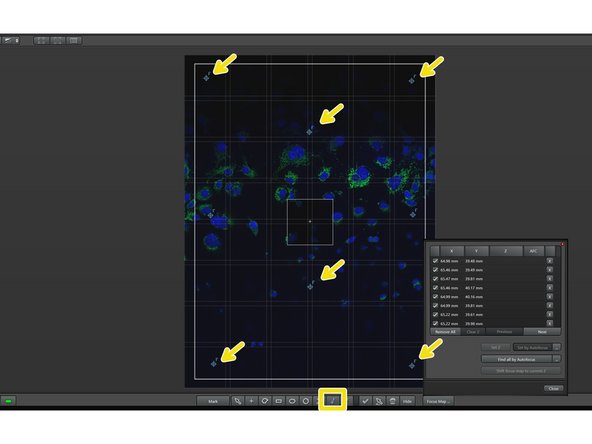
Click on "F+" and add a series of focus points.
-
Try to spread the focus points. The more you set, the better your sample will be in focus. However, do not set more than one focus point per tile.
-
-
-
Open "Focus Map" and double-click on the first focus point.
-
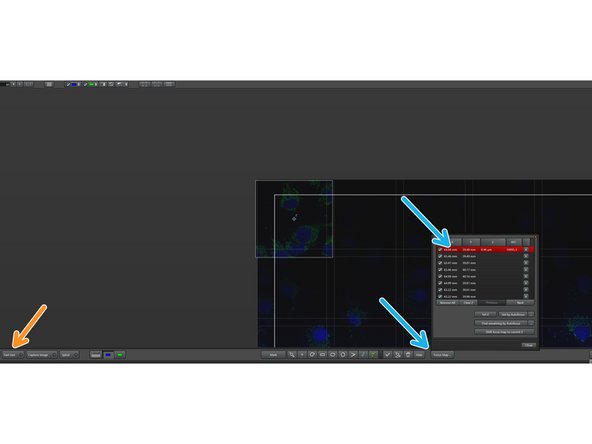
Go to "Fast Live".
-
Focus in the respective field of view with the Z-wheel on the pannel.
-
Click "Set Z", which will save a Z-position for the focus point.
-
Repeat these steps for all the focus points.
-
When all focus points are set, close the window.
-
Start your image acquisiton by pressing "Start".
-
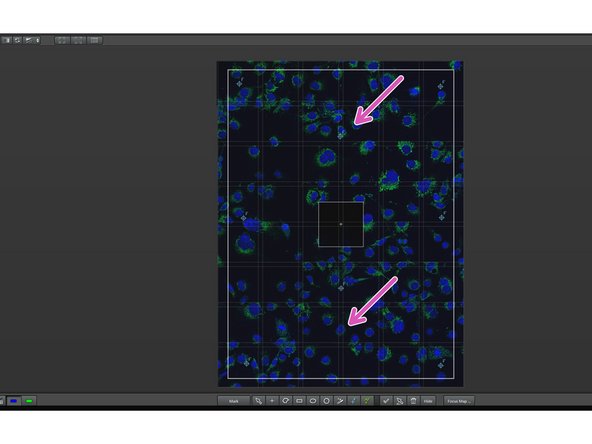
All Z-positions of your tiles are now interpolated based on your focus points, thereby rendering all areas in focus.
-