Introduction
Bitplane Imaris is a commercial software package for the visualization, segmentation and analysis of multidimensional microscopy datasets.
Besides open source tools such as Fiji, Imaris is the most used software at the ZMB to explore and analyze light microscopy data. The main reasons are the simplicity and the ease of use for visualization of microscopy data, segmentation and quantification in 3D and 4D. Especially for 3D visualization there are as of now no open source tools with a similar performance.
This guide will introduce you to the machine learning based object classification feature, introduced in Imaris 9.6.0. In contrast to the standard Imaris object filtering workflow, this feature allows for an automated labeling based object classification. This allows for simple, fast and powerful insights into the underlying object distributions in your data.
Please also check out the other guides of the Imaris series, especially the guide Imaris Part 1: File Import Using Arena.
This guide was written using Bitplane Imaris 9.6.0.
-
-
The object classification workflow works for both, surface as well as spot objects. In this guide we explain it using surface objects.
-
If you have pre 9.0 Imaris files containing segmented surface objects, you need to recreate those.
-
When generating new surface objects, you can select "Classify Surfaces" in the surface wizard.
-
If you want to include relative object distances in your classification you should also select "Shortest Distance Calculation".
-
If you have a recent Imaris file with already segmented surface objects you can directly start classifying via the surface menu.
-
Resaving your old Imaris files in the most recent .ims format and avoiding pre 9.0 surface objects in your file will improve the performance and stability of Imaris.
-
-
-
In the surface generation wizard you can find now a classification step.
-
You can define and name multiple independent classifiers for the same object set.
-
You can select if you want to use a 1D, 2D or machine learning (ML) classifier. In this step we use "Filter1D"
-
You can add or remove classifiers.
-
For 1D classification you can select a single feature for classification.
-
You can add and remove classes.
-
In the histogram view you can change the tresholds for your 1D classification.
-
-
-
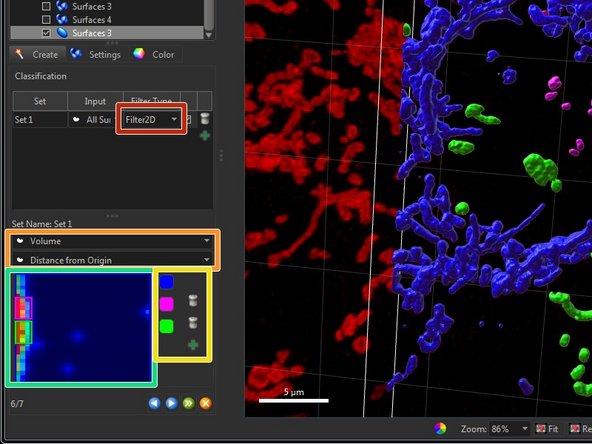
Use "Filter2D" for 2D classification.
-
Select two features for classification.
-
Define the number of needed classes.
-
Draw rectangular boxes in the 2D plot for defining your classes.
-
-
-
Machine learning (ML) based classification does not need a feature selection. It includes all features and based on your data and labels it chooses the best ones.
-
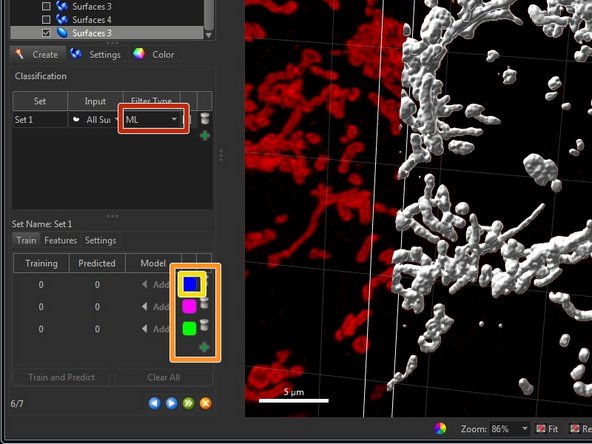
Select "ML" for machine learning based classification.
-
Add the needed amount of classes.
-
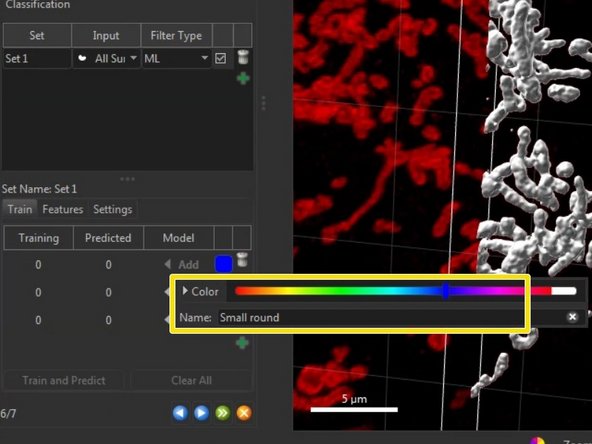
Click on the class color for color adjustment as well as for giving a meaningful name.
-
-
-
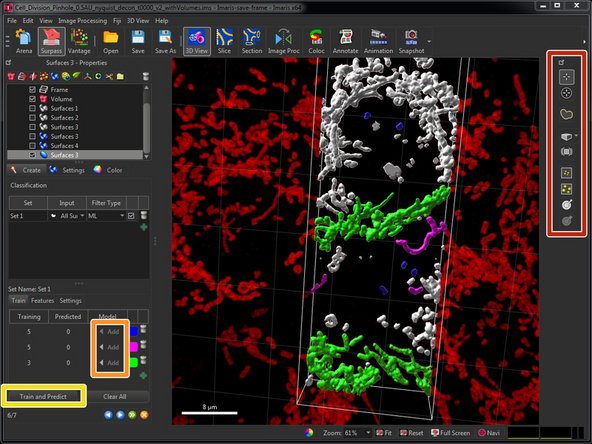
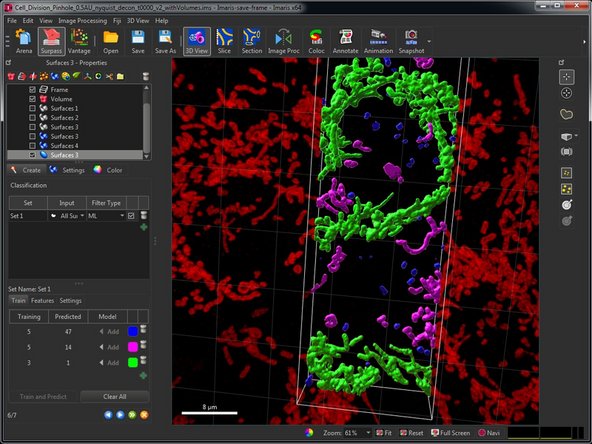
Use the selection tools to select objects corresponding to one class. Holding the "Control" key allows for selecting multiple objects at once.
-
Add the selected objects to the corresponding class. This is called labeling.
-
Click "Train and Predict" to train your classifier using your current labels.
-
Check the classification result and refine the classifier by adding more labels or reassigning objects to different classes. Retrain the classifier by re-running "Training and Predict".
-
-
-
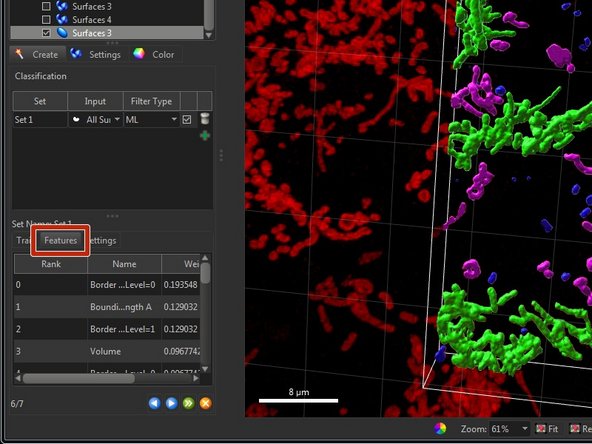
In "Features" you can explore the relevant features the classifier uses for the current prediction.
-
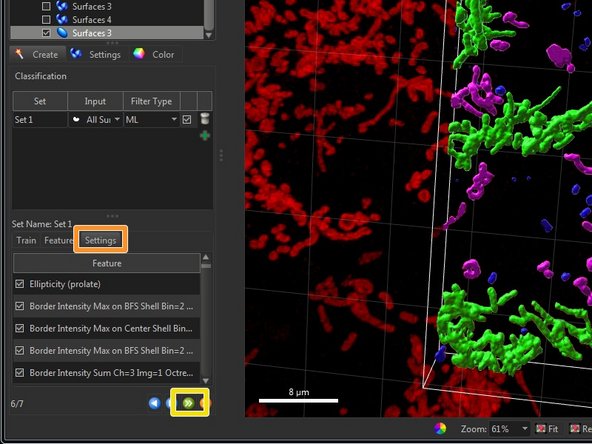
In "Settings" you can select or de-select features used for classification. Usually this is not needed but can be used to bias the classifier towards some aspects of your data.
-
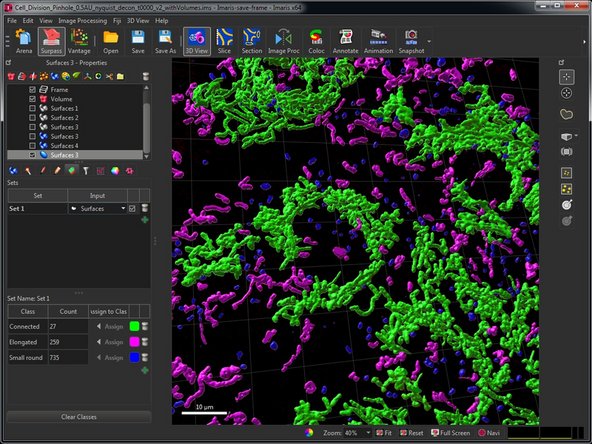
If you are happy with your trained classifier finish the wizard and all objects will be classified.
-
-
-
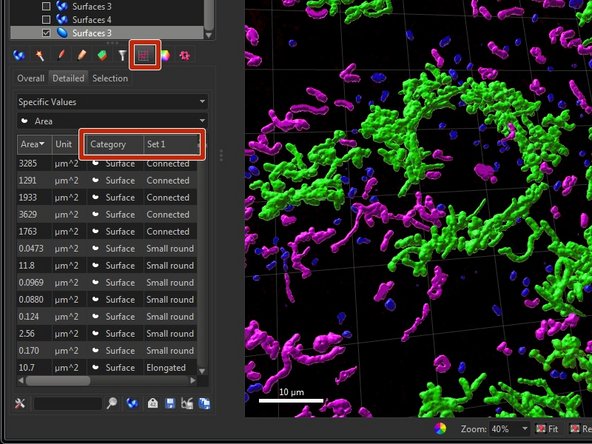
In the "Statistics" tab of your surfaces you see the object class and can explore the respective class statistics.
-
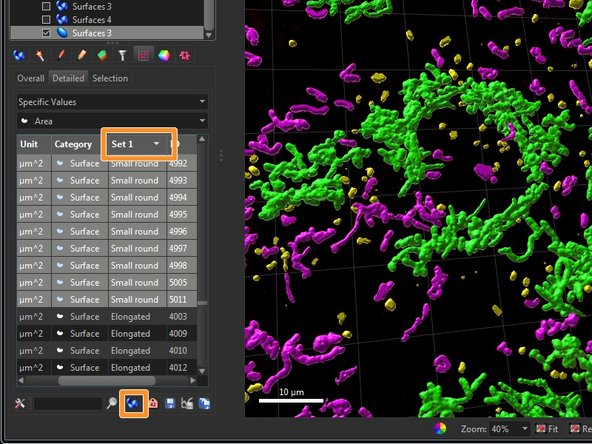
By ordering by class and selecting the corresponding objects you can select and further work with the classified objects such as generating a new surface object only containing objects of one class.
-
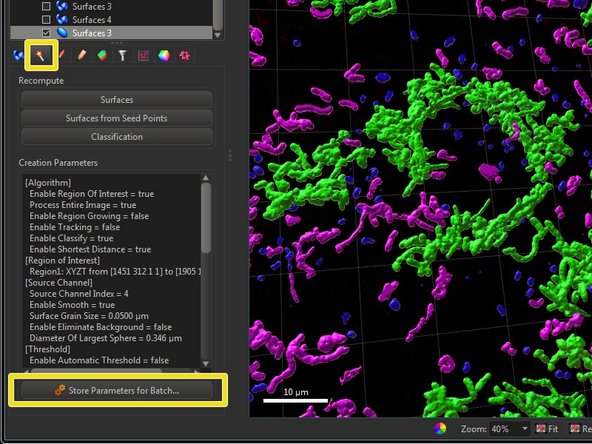
Classification can also be included in batch processing. For that click "Store Parameters for Batch" after successful classification.
-


