
Introduction
Bitplane Imaris is a commercial software package for the visualization, segmentation and analysis of multidimensional microscopy datasets.
Besides open source tools such as Fiji, Imaris is the most used software at the ZMB to explore and analyze light microscopy data. The main reasons are the simplicity and the ease of use for visualization of microscopy data, segmentation and quantification in 3D and 4D. Especially for 3D visualization there are as of now no open source tools with a similar performance.
This guide will introduce you to the visualization of 3D and 4D microscopy datasets with Bitplane Imaris.
Please also check out the other guides of the Imaris series, especially the guide Imaris Part 1: File Import Using Arena.
This guide was written using Bitplane Imaris 9.3.0.
-
-
Reserve and open a ZMB image processing virtual machine.
-
Open Imaris x64 9.3.0
-
Imaris will automatically start in the "Arena" view.
-
If you are not familiar with this feature please refer to Imaris Part 1: File Import using Arena.
-
-
-
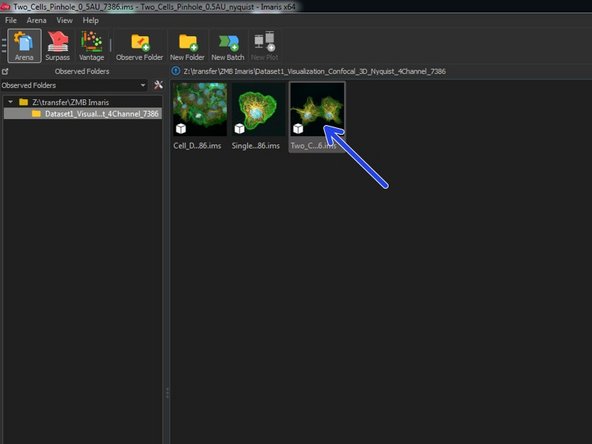
Use the "Observe Folder" icon to add folders to the "Arena" view.
-
You will find the image properties on the top right corner.
-
Depending on the size and the number of files, indexing of a new "Observed Folder" can some time.
-
-
-
Double click to open your *.ims file.
-
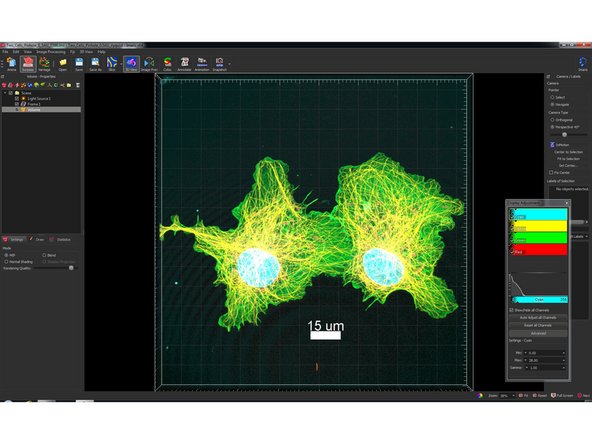
This opens your image in the "Surpass" view.
-
If your files are not being properly converted to *.ims please refer to to Imaris Part 1: File Import using Arena.
-
-
-
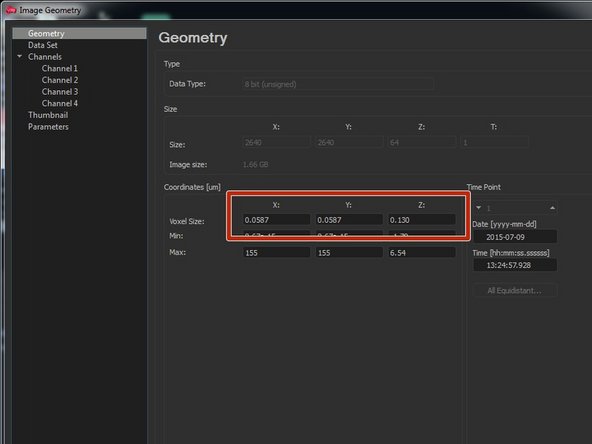
You can explore the metadata of the file through:
-
Edit>Image Properties
-
Depending on your source file format (e.g. tif) the pixel/voxel size and the times in time series might not be calibrated. Be sure to check and correct the values here if needed.
-
-
-
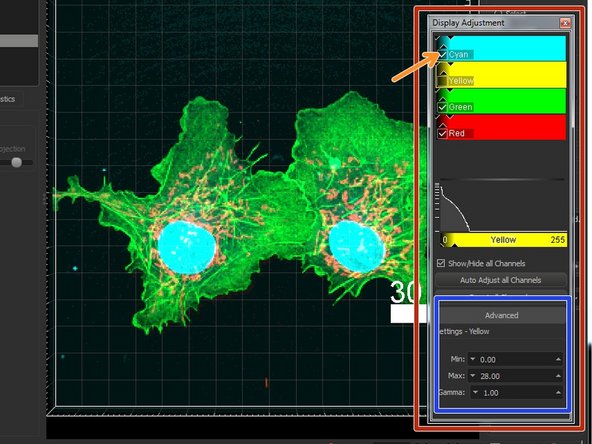
You can adjust the color representations (LUTs) of the different channels in the "Display Adjustment" window
-
If this window is not visible use: Edit>Show Display Adjustment or Ctrl+D
-
Click on “Advanced” to manually set the min/max values as well as a gamma.
-
Click on the channel names to change the names as well as the LUTs.
-
Uncheck the checkbox to hide/show individual channels.
-
-
-
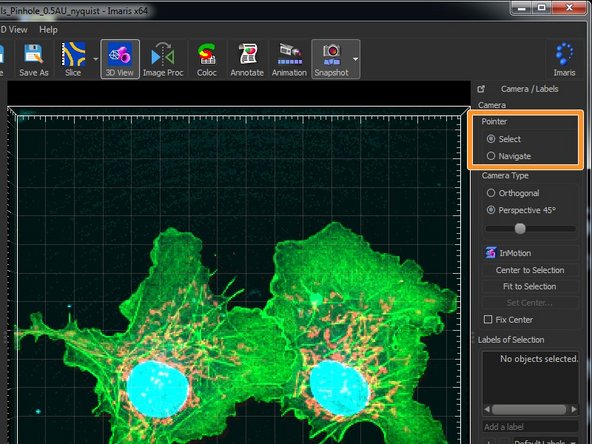
By choosing Navigate you will be able to zoom in and out of your image by using the mouse wheel.
-
To rotate your image keep the left mouse button pressed while moving.
-
Use Select to manipulate the appearance of your scale bar.
-
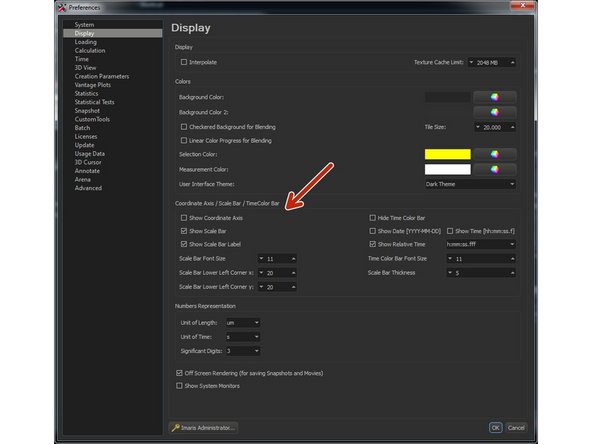
If you are not happy with the color of your scale bar or want to deactivate it completely, go to File>Preferences>Display
-
Here you can adjust the scale bar representation to your liking. Keep in mind that these settings are global and will be kept when you next time start and use Imaris.
-
-
-
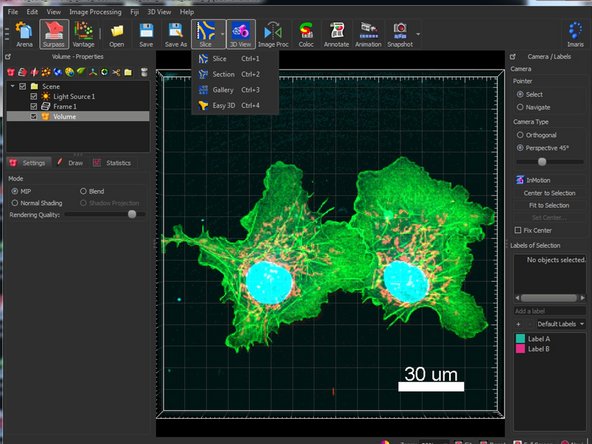
Explore the different slice image representations under the Slice icon such as the Section (Normally called ortho viewer).
-
The Slice representation also allows you to do a maximum intensity projection of your dataset (Easy 3D).
-
-
-
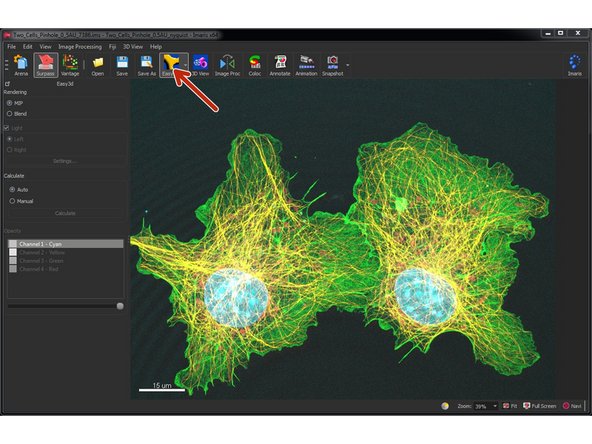
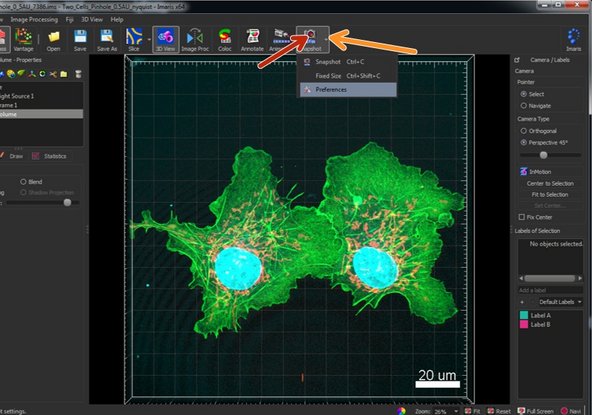
After adjusting the representation of your image you can export the current view with the Snapshot tool.
-
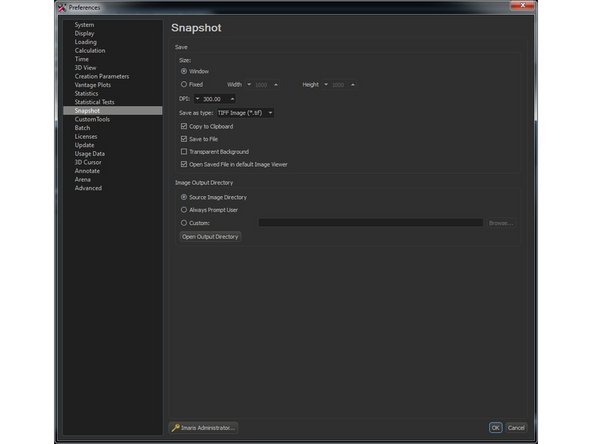
Use the arrow on the right of the Snapshot icon or File>Preferences>Snapshot to define your export settings.
-
Export your image(s) by clicking on the Snapshot icon.
-
Make sure you check where your snapshots are being saved. You can use this approach to export publication ready images.
-
-
-
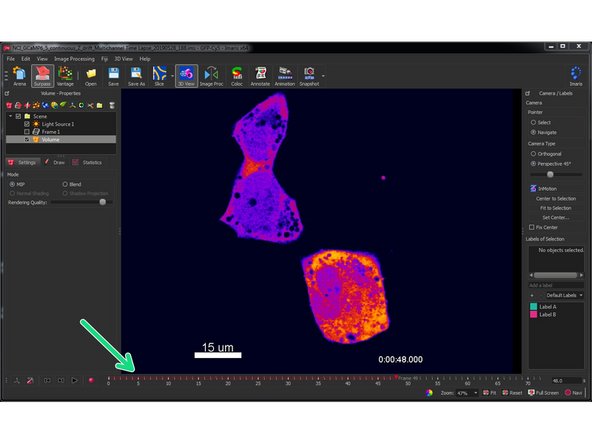
If you open 2D or 3D time series, you should see a time bar which allows you to navigate the time dimension of your series.
-
If you imported data without specifying the dimensions, (e.g. a 2D time series loaded as a single 3D volume) you can change this through Image Processing>Swap Time and Z
-
-
-
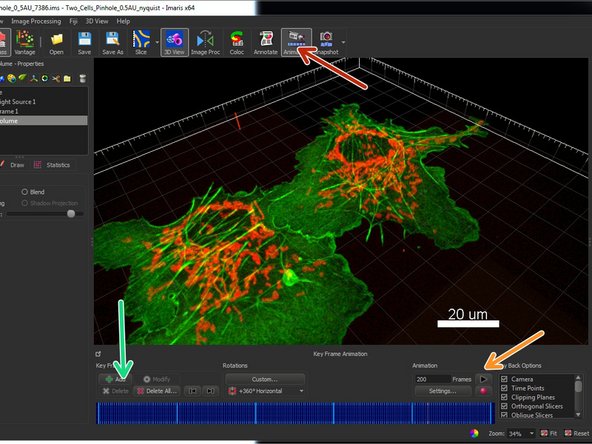
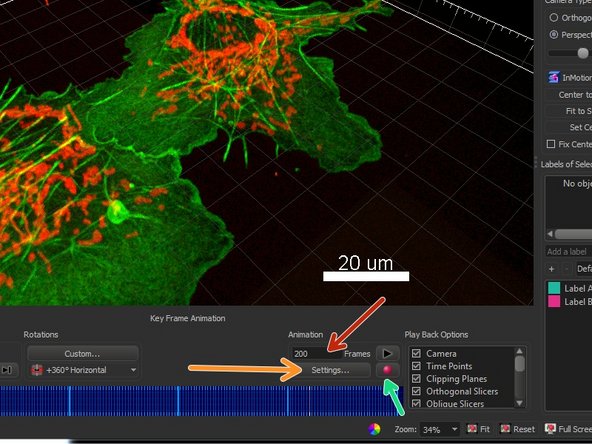
To render 3D or 4D data sets as a movie sequence use the Animation icon.
-
Use the navigation pointer to find a perspective/view and zoom factor you like and use + Add to add keyframes.
-
Go to another position and add the next keyframe.
-
Avoid changing the view too much in between two key frames - otherwise your audience might become seasick.
-
You can add as much keyframes as you like. Operations such as changing the brightness, show or hide certain channels, shown time points can also be included as transformations in between keyframes.
-
You can review your animation using the play button.
-
-
-
Too many keyframes in to few animation frames might lead to a sluggish animation or stuttering. In this case increase the number of frames.
-
Please consider that increasing the number of frames will also increase your movie file size.
-
Under “Settings” you can adjust the frame rate. Values above 25 are recommended in order to get smooth movies.
-
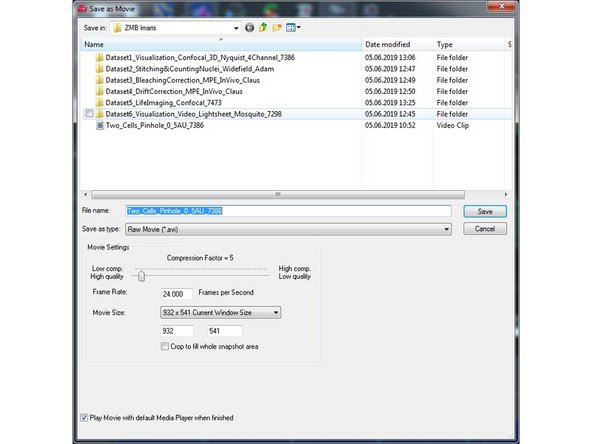
Press the red record button to render and save the movie. Here you can choose the destination folder as well as file type.
-


Cancel: I did not complete this guide.
One other person completed this guide.
