Introduction
Ilastik is a simple, user-friendly open source tool for interactive image classification, segmentation and analysis.
At the ZMB, we use it as a segmentation and particle tracking solution for projects where classical intensity based thresholding strategies fail.
In many of those projects it is needed to train the pixel classifier using examples from different experimental conditions and/or datasets in order to optimally include the available experimental variability.
After successful training this classifier can then be used to classify large amounts of images.
In this guide we describe the important steps in performing pixel classification of larger datasets using the Ilastik batch functionality.
This guide does not explain the basic usuage of the Ilastik Pixel classification. Check out our Ilastik beginners guide for that.
-
-
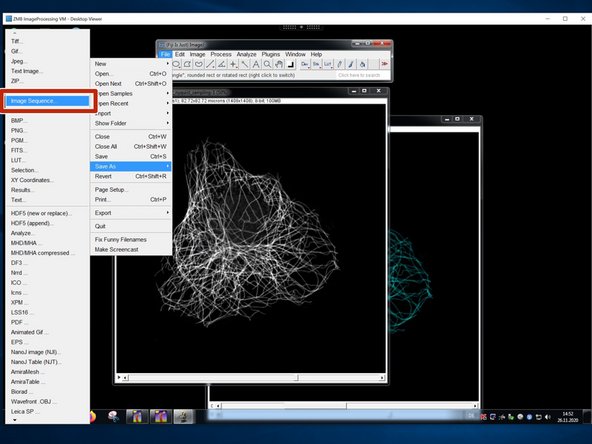
Open FIJI.
-
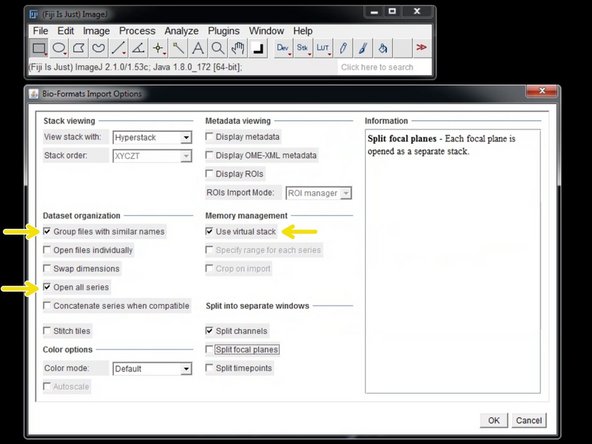
Open your raw microscope images using "Bio-formats" importer.
-
In the "Import Options" choose "Group files with similar names" and "Use virtual stack".
-
If available, select the files you want to import.
-
-
-
When imported, use the channel slider to select your channel of choice.
-
Use the "Reduce Dimensionality" function to duplicate the selected channel data.
-
Select "Slices" and "Keep source".
-
-
-
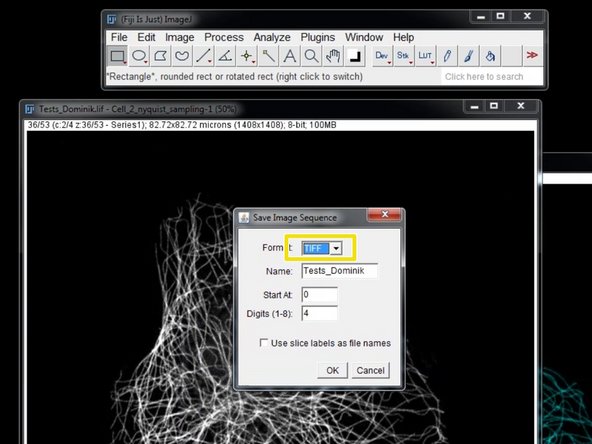
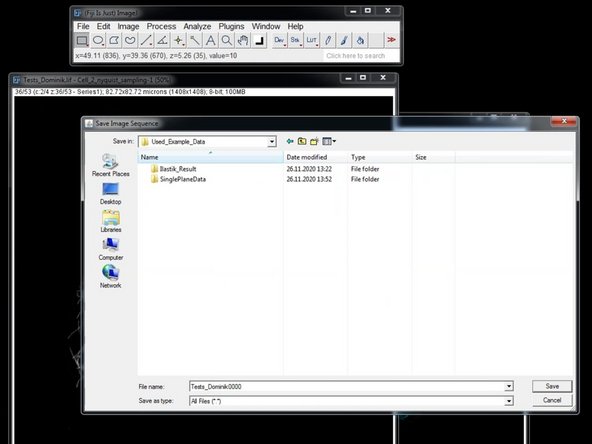
Save the duplicated stack as "Image Sequence".
-
Choose "TIFF".
-
Save your tiff image series into a new folder.
-
-
-
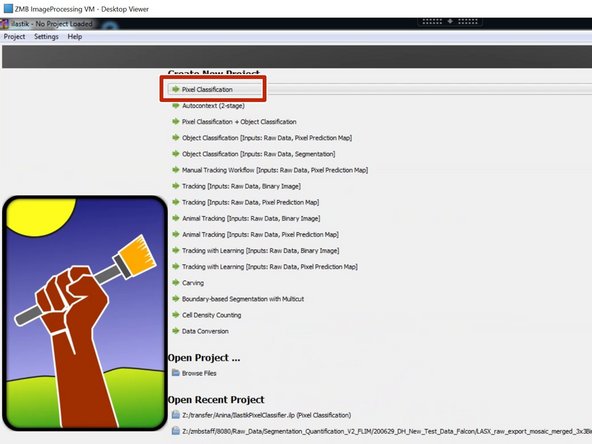
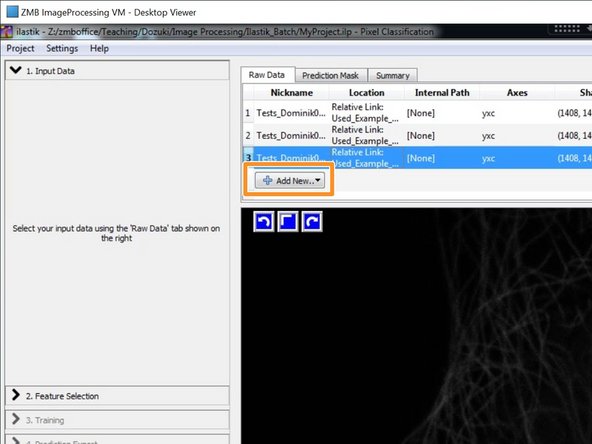
Open Ilastik and generate a new "Pixel Classification" project.
-
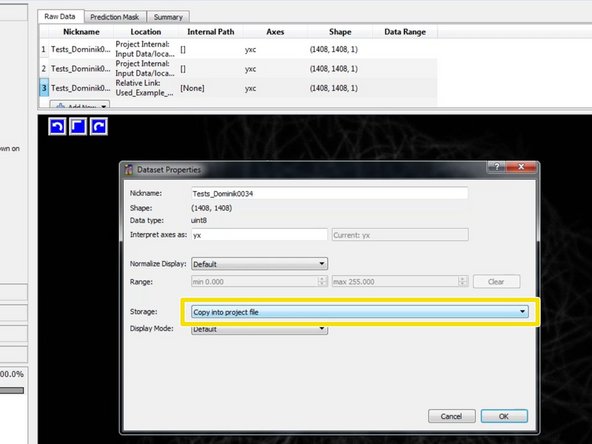
Add your training data as "Separate Images".
-
To avoid path problems and to increase the performance, double click on each selected training image and select "Copy into project file".
-
The training data should span all the experimental variability you have in your image data.
-
Image and pixelsize as well as image dimensionalities have to be exactly the same for all training images as well as for the images later used for being classified!
-
-
-
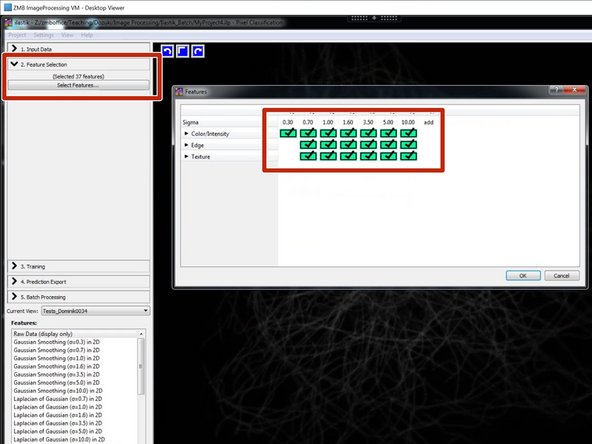
Select your features.
-
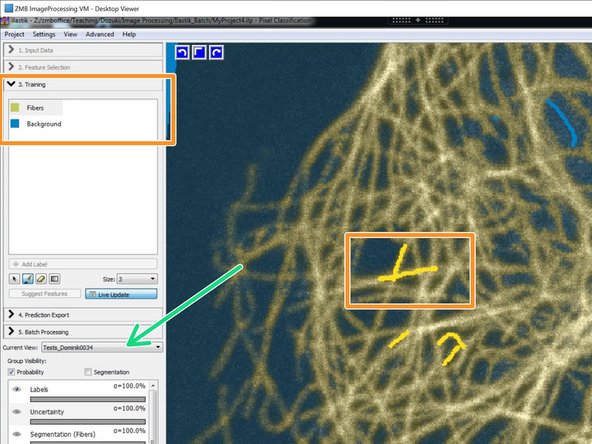
Train your classifier.
-
Be sure to train and check the classifier performance on all used training images.
-
Further information about the basic operation of Ilastik can be found in the beginners guide.
-
-
-
In "Prediction Export" choose "Probabilities" and open "Choose Export Image Settings":
-
Select "unsigned 8-bit".
-
Renormalize from: 0-1 to 0-255.
-
Choose "tiff" as output file format.
-
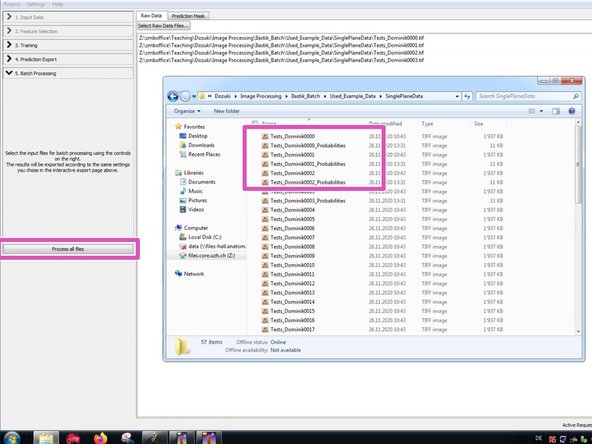
For saving the results into the source folder with a new name, choose the proposed file name encoding: "{dataset_dir}/{nickname}_{result_type}.tiff"
-
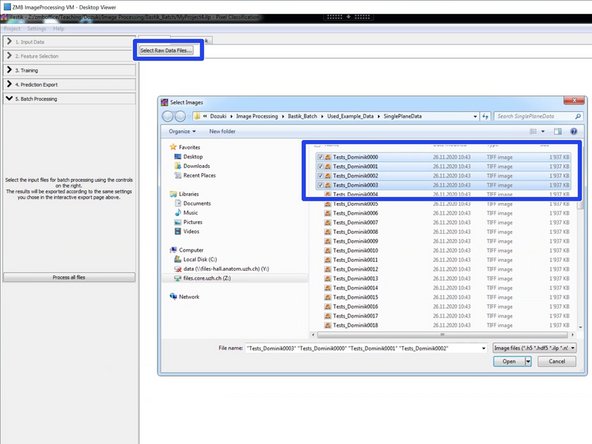
In "Batch Processing" select a small data set for testing your classifier and your export settings.
-
Run it and check the results in the source folder.
-
-
-
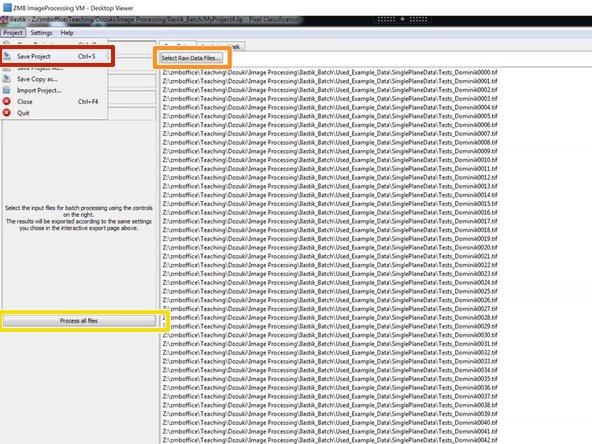
Be sure to save your project at this point.
-
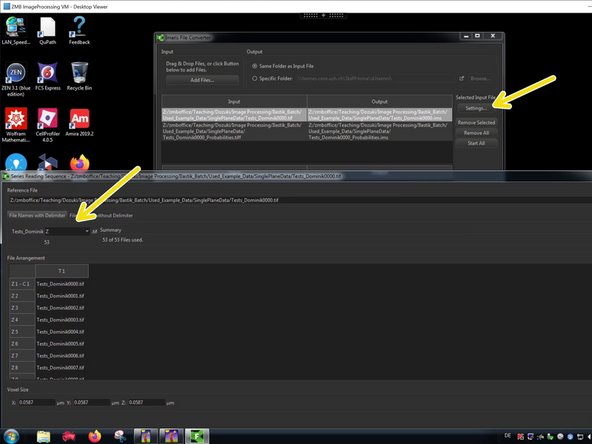
Add all files for processing.
-
Process your files. Depending on the amount of data, this might take some time.
-
-
-
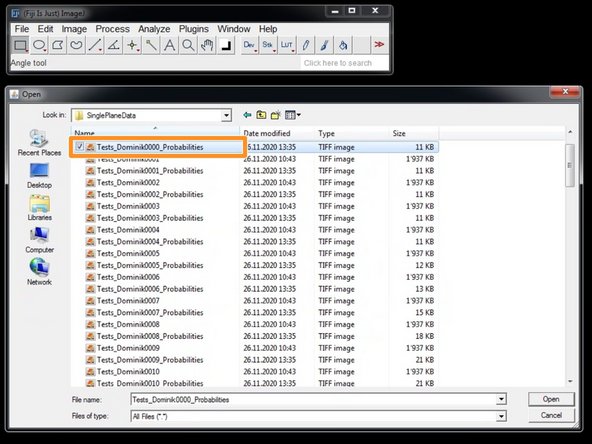
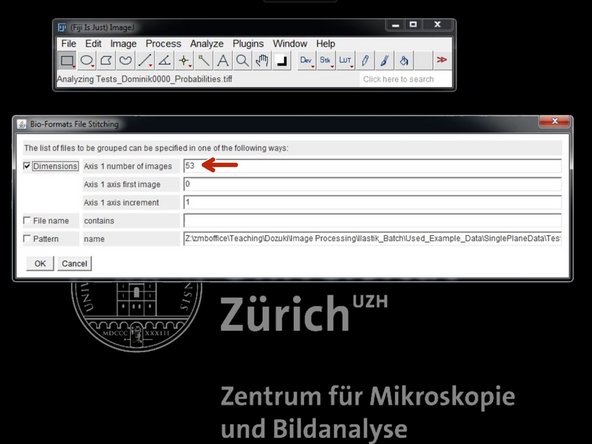
In FIJI open the resulting Ilastik probabilities using "Bio-Formats" reader.
-
Select the first of your probability files.
-
Use the following settings:
-
"Group files with similar names"
-
"Open all series"
-
"Use virtual stack"
-
-
-
In "Dimensionality" check the number of images and press "OK".
-
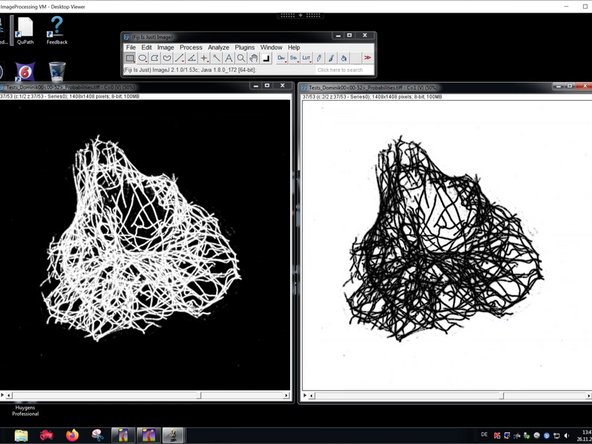
Now you can work using the imported probability maps in FIJI.
-
Keep in mind that we rescaled the probabilities to 8 Bit. As an example this means a probability of 0.6 for a specific class is mapped to a pixel intensity of 0.6*255=153 in the respective channel.
-
If you want to extract the real image intensity information based on a thresholding of the probabilities, be sure to also open the raw data and to redirect your analysis using "Analyze/Set Measurement/Redirect to".
-
-
-
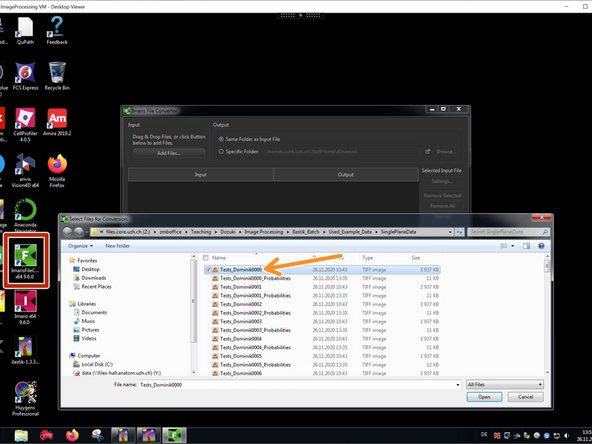
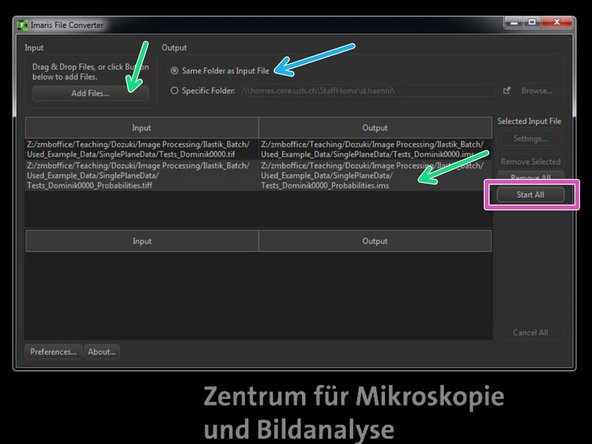
Open the "Imaris File Converter".
-
"Add files" and select the first file for importing.
-
Go to "Settings" and check that the dimensionalities are properly assigned.
-
Repeat this step to add other files to the import job as needed (e.g. Raw data and probabilities).
-
Select "Same Folder as Input File".
-
Click "Start All" to start the file import.
-
-
-
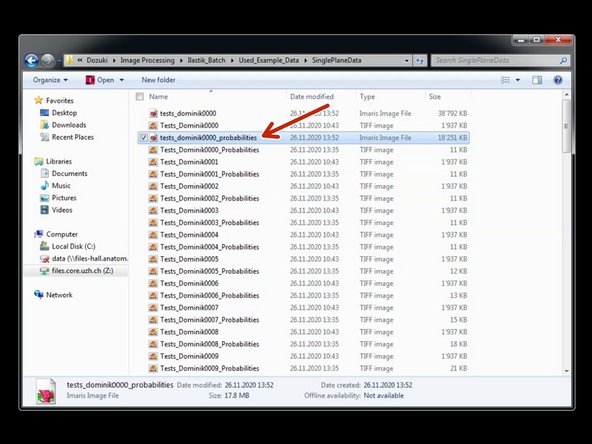
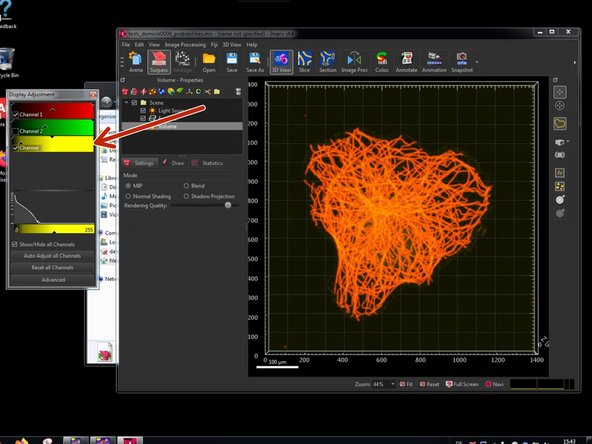
Double click on a converted .ims file to open it using Imaris.
-
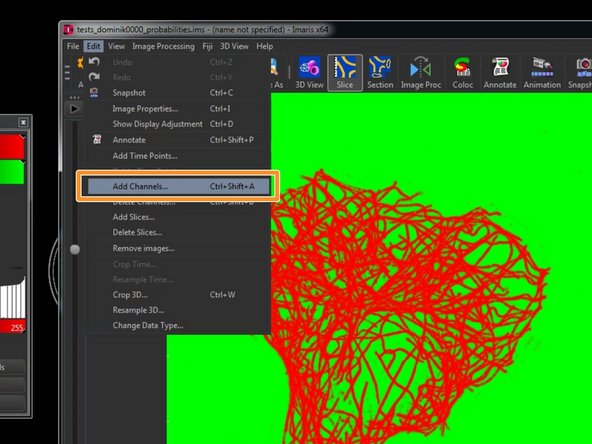
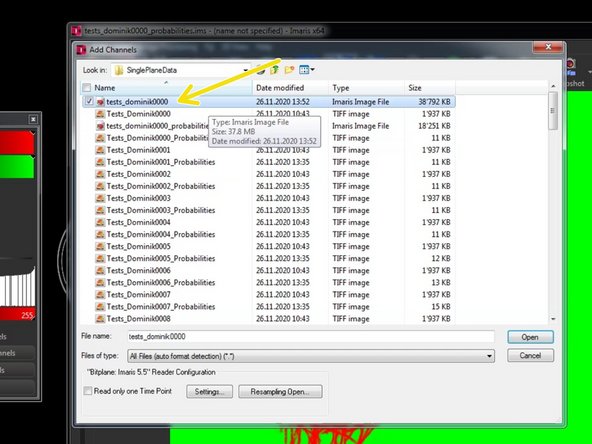
To combine the converted raw data and the converted Ilastik probabilities as individual channels in a single file for further processing, go to "Edit/Add Channels".
-
Select the previously converted .ims file and click "Open".
-
If the file has exactly the same dimensions (x,y,z,t) as the already opened file, it will be added as a new channel.
-
-
-
A new channel should be visible now.
-
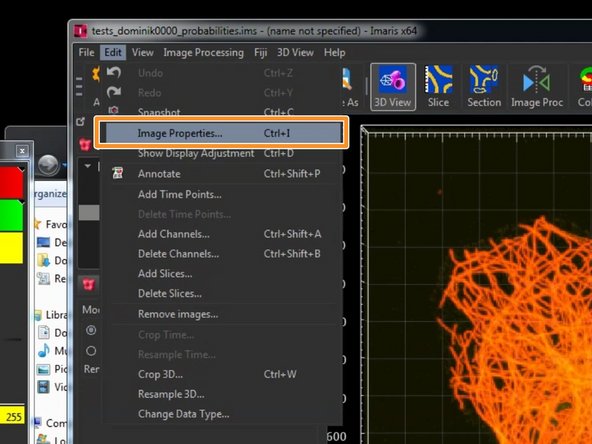
Upon processing image data by such a pipeline, metadata such as the voxel size might be lost.
-
Go to "Edit/Image Properties".
-
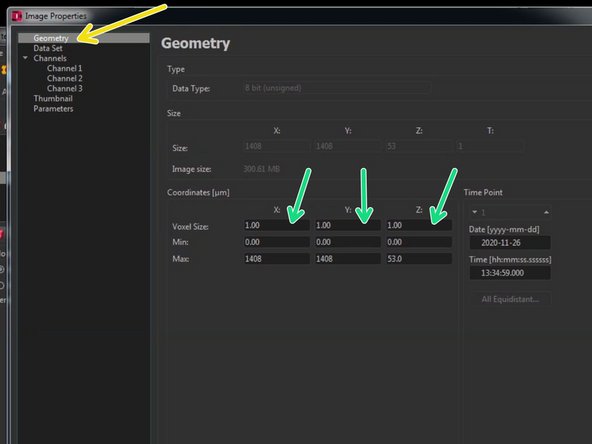
Go to "Geometry".
-
Here you can find the x/y/z dimensions in micrometer. Check and adjust them by comparing it to your microscope raw data.
-