Introduction
In this guide of the Center for Microscopy and Image Analysis you will learn how to set-up and perform a simple screen on the GE InCell Analyzer 2500 HS widefield fluorescence microscope.
-
-
The InCell microscope and the control computer are always running. Therefore, there is no need to power-on and to power off this microscope or the computer.
-
Log-in with your ZMB credentials.
-
Start the "IN Cell Analyzer" software via the desktop icon.
-
-
-
The standard sample format for the InCell microscope is a 96 well plate. However there are also holders and adapters for slides, slide sized live cell chambers as well as petri dishes.
-
In the cabinet close to the entrance door you can find the accessories including different sample holders.
-
Either use a well plate or choose a suitable sample holder.
-
-
-
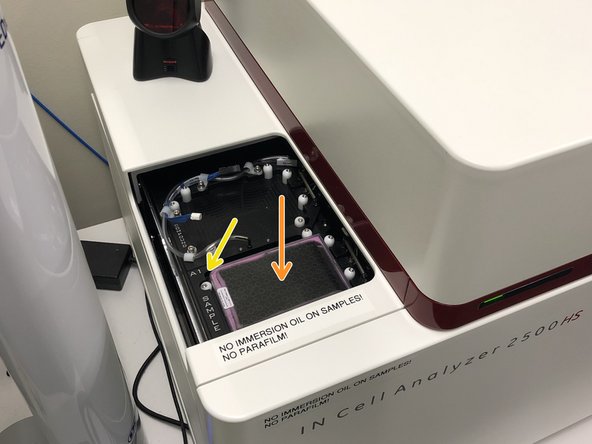
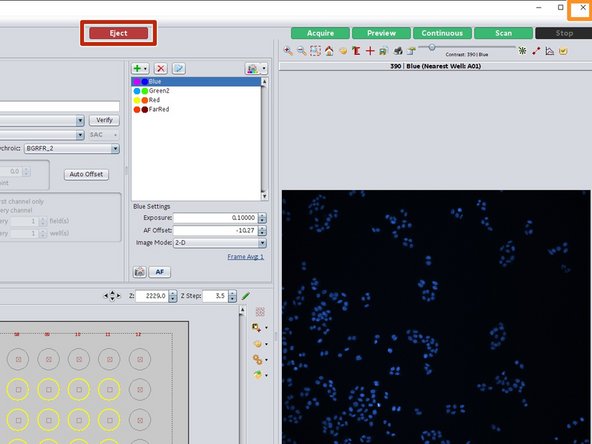
In the software click on "Eject" to open the microscope door.
-
Insert your plate or sample holder.
-
Make sure that the orientation is correct (A1 should be on the top left corner).
-
Remove the lid of your sample if you are imaging in Transmission/DIC/Phase contrast mode.
-
In the software click on "Load".
-
-
-
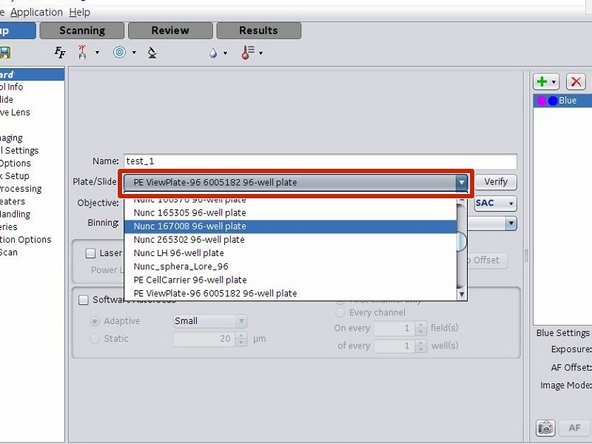
Select a plate/slide template.
-
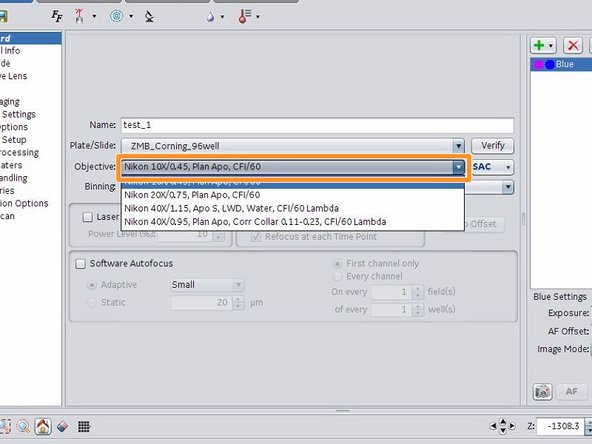
Select an objective.
-
The InCell microscope is optimized for imaging regular arranged specimens such as well-plates. When producing/imaging slides we recommend to precisely mount them using the available ZMB templates. For such arranged slides we also have suitable slide definitions on the microscope.
-
Adjusting or generating plate/slide templates and using the water immersion objective is explained in separate guides.
-
-
-
Choose a suitable polychroic:
-
BGOFR_1: Blue (390/18), Green (475/28), Orange (524/27), Far Red (632/22)
-
BGOFR_2: Blue (390/18), Green (475/28), Red (575/25), Far Red (632/22)
-
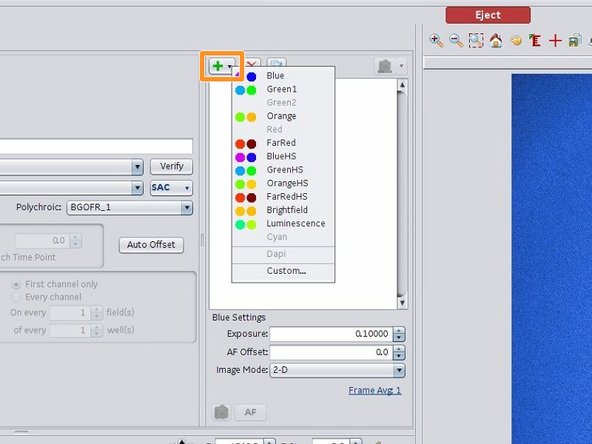
Add the wanted channels by using the "+" icon.
-
Hoovering with the mouse over a channel opens a context information box with additional information.
-
-
-
To move the stage, click in the center of a well or cover slip.
-
Activate the "Laser Autofocus". The needed power level depends on the objective as well as the sample.
-
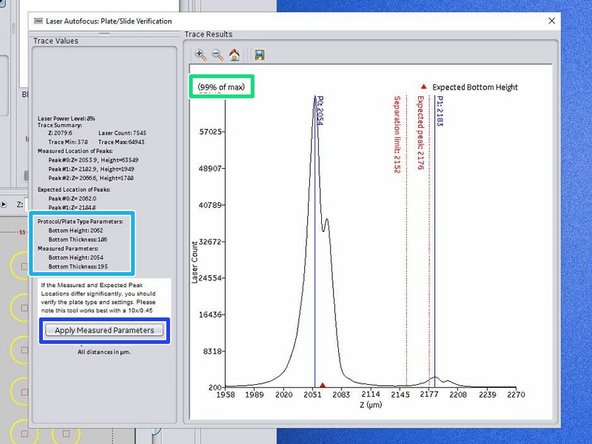
Check the laser auto focus trace by clicking "Verify":
-
If the signal is saturated, reduce the auto focus laser power.
-
If the "Measured Parameters" deviate more than 10% of the "Protocal/Plate Parameters" adjust the plate parameters.
-
Click "Apply Measured Parameters" for doing that.
-
Click "Apply" in the "Plate Editor" for adjusting the plate parameters to the measured values.
-
If you execute "Verify" without beeing within a well/slide, it can happen that the objective presses the sample up. Since the plate is fixed within the instrument, you end up with a tilted plate and focusing is not possible anymore. To resolve such issues eject and reload your plate.
-
-
-
Under most conditions the laser auto focus system of the InCell microscope is very fast and reliable. Therefore, an additional, much slower software auto focus step is usually not required.
-
Check the "Software Autofocus" checkmark to engage the software autofocus.
-
Specify a z axis search range.
-
Define the channel as well as the frequency for performing a software auto focus.
-
The InCell microscope uses the integrated image intensity as the optimization parameter for the software auto focus system. This means the software autofocus will focus on the brightest z plane.
-
-
-
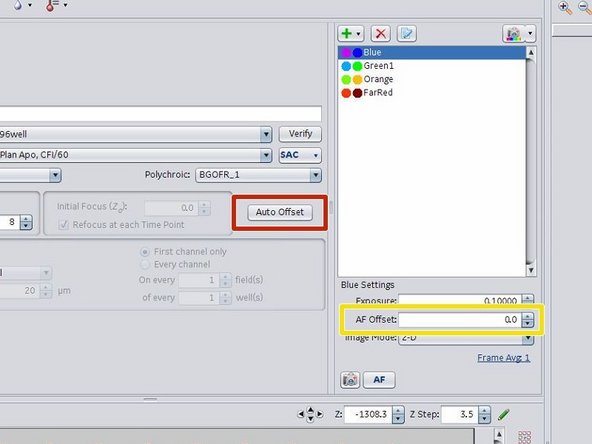
Usually there is a z offset between the found laser auto focus position and your brightest fluorescence signal.
-
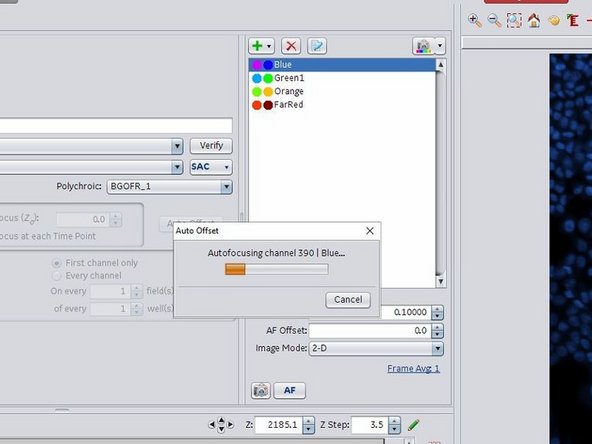
Click on "Auto Offset" to automatically measure the offset for the selected channels.
-
When done, the software shows you the resulting offsets. They should be in a similar range for all channel. If a channel shows a quite different value then you can:
-
Move to another position and try again.
-
Check the signal in this channel, adjust the exposure (see next step) and try again.
-
Manually adjust the offset to the same value as in another channel.
-
The measured offsets will be set in the "AF Offset" window. They also can be manually adjusted there.
-
-
-
On the InCell microscope the signal intensity can only be adjusted by the camera exposure time.
-
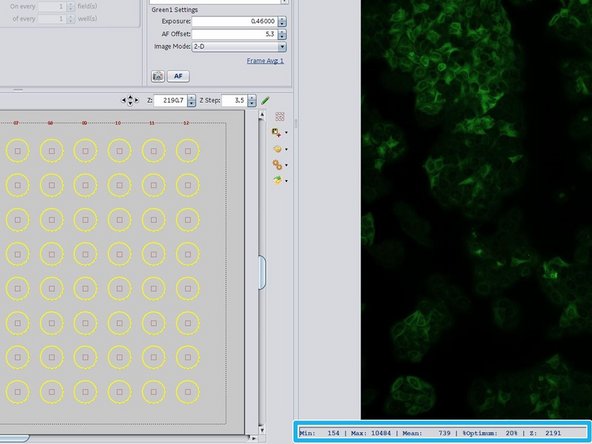
Select the first channel and press "AF". A laser auto focus will be performed, the offset applied and an image generated.
-
Check the image statistics. This microscope has a 16 Bit scmos camera so the dynamic range can be very high.
-
Depending on your statistics, adjust the exposure time.
-
Click on the camera symbol icon to make an image with the new exposure setting. When using the camera symbol no auto focus is performed.
-
Check again your image statistics.
-
Repeat this step for all channels.
-
-
-
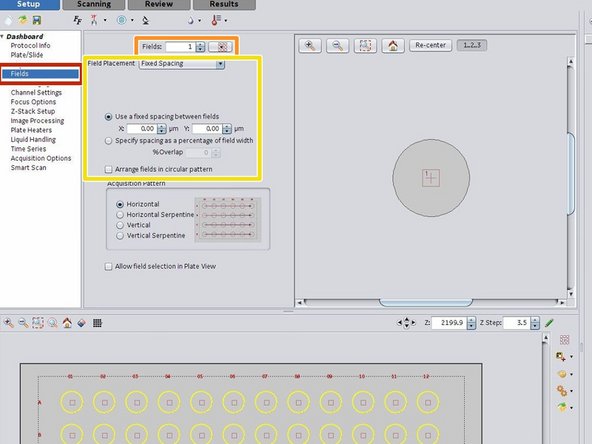
In the left menu select the "Fields" settings.
-
Here you can select the number of fields acquired in each well.
-
Next you can adjust the field placement, spacing as well as the acquisition strategy for the fields in a well.
-
-
-
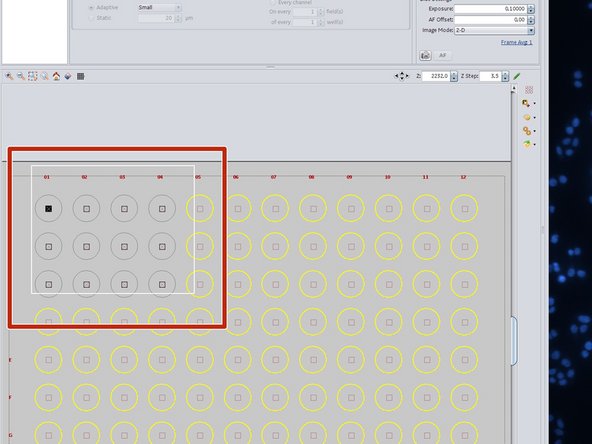
In the plate view you can select/unselect wells for acquisition.
-
Shift and holding the left mouse button can be used to unselect wells.
-
Control and holding the left mouse button can be used to select wells.
-
This strategy also works for selecting/unselecting individual fields within wells.
-
-
-
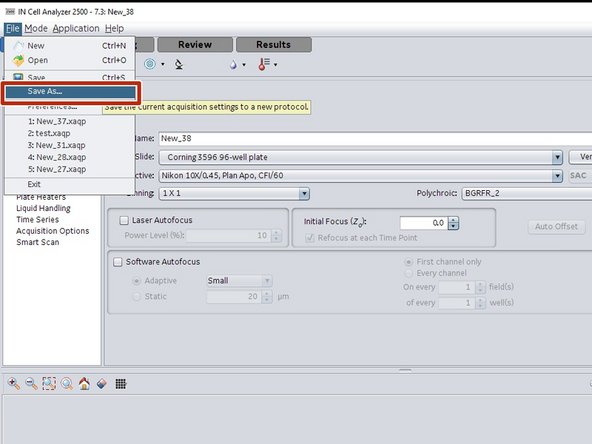
Before running a screen, you have to save your modified acquisition protocol.
-
-
-
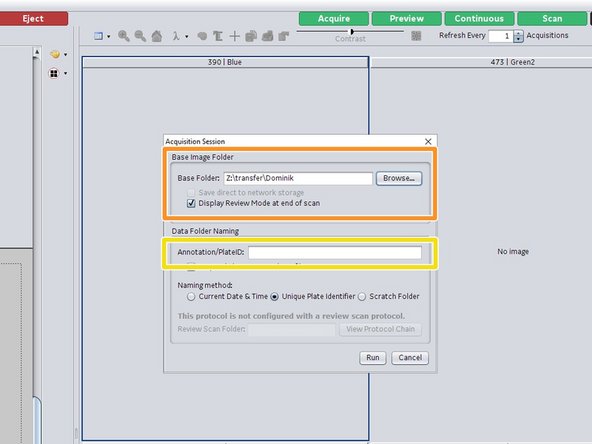
You can give an additional experiment/plate ID which is used for naming the folders.
-
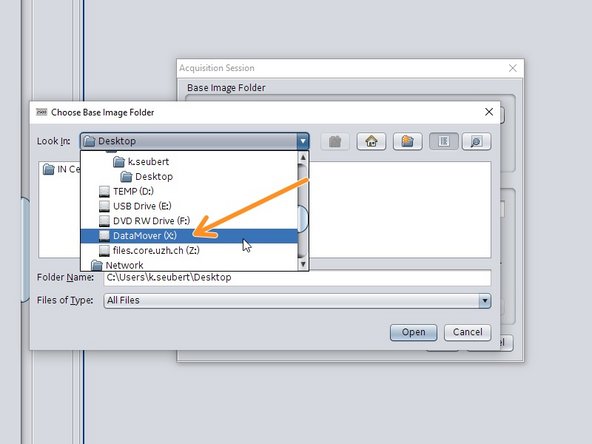
Specify a storage location for your image data. We recommend saving on DataMover (X:). You can later on move your data to the ZMB data network drive via the DataMover (see also the corresponding guide).
-
Click on "Scan" to start your scan.
-
-
-
After a scan the review mode is automatically opened.
-
For some imaging modalities such as when using deconvolution, it is necessary to reopen the dataset after acquisition and automatic processing.
-
Here you can change the displayed parameters/preview images for the plate overview.
-
Select a field for its data being displayed.
-
Explore the channels by adjusting the image intensities.
-
We recommend to use the review mode to have a quick look at the acquired data as well as for the sometimes helpful visualization of plate parameters (e.g. z focus position).
-
-
-
"Eject" and remove your sample. Click again on "Load" to close the microscope door.
-
Close the InCell software.
-
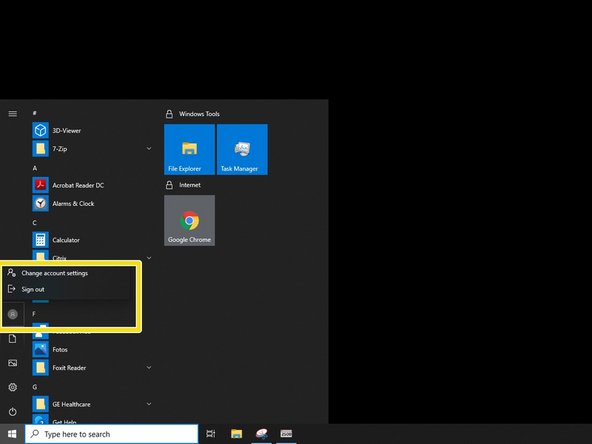
"Sign out" from the computer.
-
Do not shut down the computer and do not turn off the microscope.
-