Introduction
How to proceed during experiment:
- Check that there is approximately enough storage on the SSD Drive for your experiment.
- If not, please let us know and we will discuss how to proceed further.
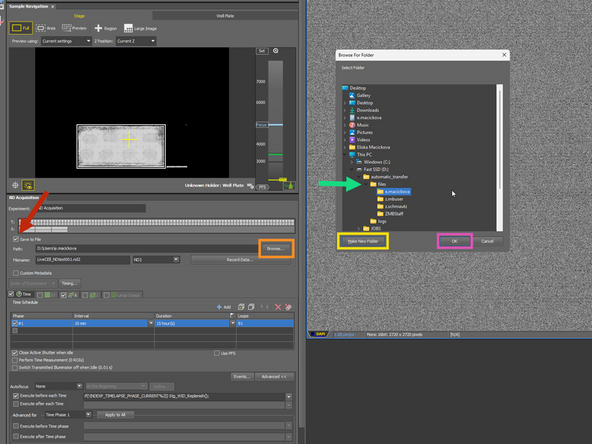
- Create a folder with your core credentials (e.g. e.macickova) in SSDdrive>automatic_transfer>files
- In the NIS-Elements define the saving filepath, to the folder which you created in previous step (that will differ for ND acquisition and JOB acquisition)
- Run the experiment
- After finishing, trigger the transfer via DataMover.
- This can be done also from your own computer.
- For this step, it is important that the PC is running at all times and never switched off. (see Microscope shut-down guide)
When to save on the local storage?
- Live cell imaging experiments > 10 minutes
- Automatized JOB experiments (well plate imaging, 4-slidehodlder imaging high-throughput imaging)
Why to save on a local storage?
Standard ND acquisition saves the dataset as a one large file. When the acquisition runs over several tens of minutes to hours, the SW keeps the file open in a memory and always appends a new image. The network is less predictable than saving on a local storage (network interruptions, server response time, etc.). This could also result in the acquisition errors or failure.
What is further recommended:
For long-term live cell acquisition with multiple positions (typically well-plate), to acquire data via JOBs, which allows you to save the time-points individually. This improves acquisition stability and precision of timing, especially for very large datasets.
-
-
Open This PC, and estimate that there is enough storage for your experiment.
-
-
-
Save to files
-
Browse
-
Make a new folder in the Fast SSD>automatic_transfer>files with the CORE credentials (e.g. e.macickova)
-
Confirm
-
-
-
This step can be done only after experiment is finished and can be done also from your own PC!
-
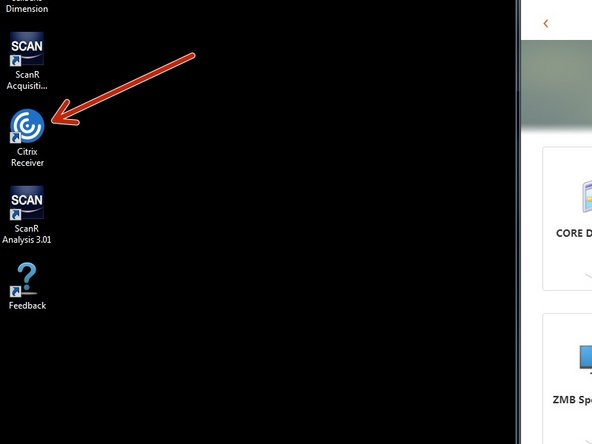
Open Citrix
-
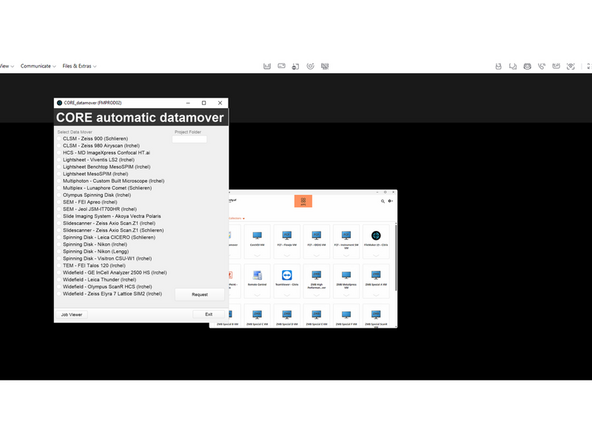
Login with CORE and open DataMover
-
Request Data either from Nikon Lengg or Nikon Irchel
-