Introduction
In this guide you will learn how to start-up and mount a sample on the ZMB Benchtop MesoSPIM lightsheet microscope.
For a full documentation about the microscope please, visit the project webpage: http://MesoSPIM.org
-
-
Switch on the main switch located on the right side of the monitor.
-
Turn the laser key to "ON" position
-
Switch on the computer below the monitor table.
-
Log-in to instrument computer with your ZMB credentials.
-
Open the front door and on the upper right side you can switch on the light.
-
Use the joystick to bring the sample holder stage up
-
-
-
Start Oxxius laser controller software. You will find the shortcut in the desktop
-
Select "USB L4CC-00590"
-
Click "connect". The laser panel will open.
-
Click on the upper right arrow to open the shutter control menu.
-
Open both laser shutter
-
The laser menu should look like this.
-
-
-
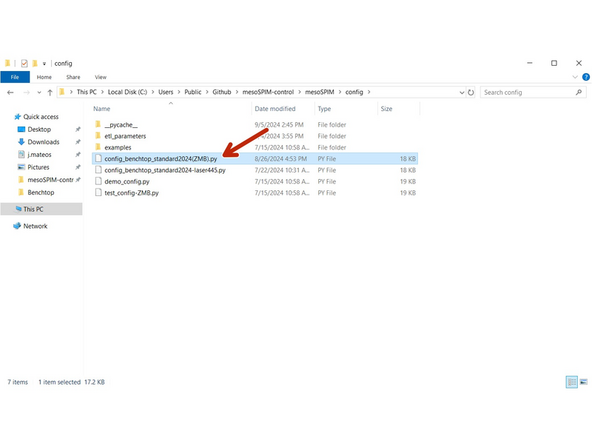
Double click on the "MesoSPIM Control" icon. A window will appear to select the mesoSPIM config file. Select: "config_benchtp_standard2024(ZMB).py"
-
A new window will appear to select the ETL parameters.
-
Select your personal ETL configuration file which has been created during your microscope introduction.
-
The microscope control, viewfinder, Tiles control, camera and acquisition manager windows will appear.
-
-
-
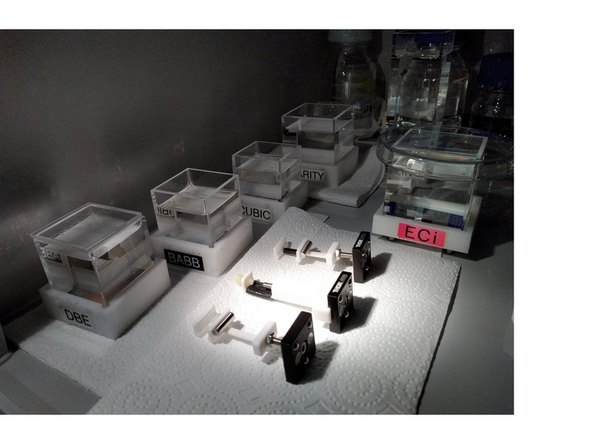
Take the immersion cuvette according to your sample from the chemical hood.
-
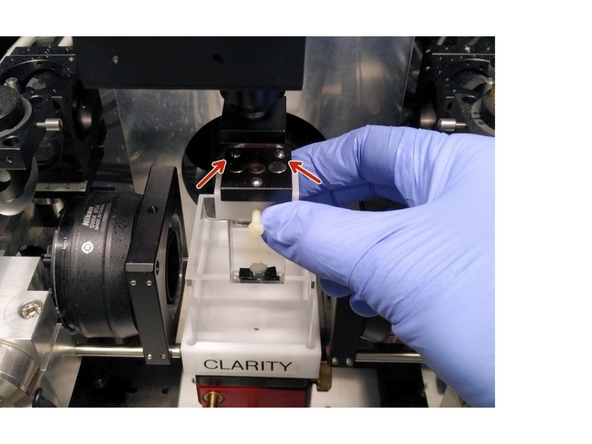
Insert the sample holder with the two two balls to the back.
-
-
-
Perform this ETL adjustment before inserting the sample. Here the main steps:
-
In the menu, select ETL. Select Freeze galvos to visualize the stationary laser beam.
-
In Controls, change the filter to Empty-Alignment to see laser scattering (not fluorescence).
-
Set ETL amplitude to 0 and adjust the offset values until beam waist becomes centered.
-
Adjust ETL amplitude to achieve uniformly thin beam.
-
click Save current ETL parametter to csv.
-
Repeat the process for the other side laser.
-
At the end click unfreeze galvos and select a filter like "405-488-561-640-Quadrupleblock".
-
-
-
In the movement menu, sample translation XY field, press LOAD and watch carefully (!) as sample moves into the immersion chamber. If you see a potential collision, press the red STOP button immediately.
-
If the LOAD move is complete and the sample needs to be lowered further, use the "south" blue arrow button to bring the sample further down into the immersion chamber until you see it in the center of your detection objective.
-
Switch off the light of the light insulation box.
-
Cancel: I did not complete this guide.
One other person completed this guide.


